Showing posts with label Mess of making. Show all posts

Saturday, 1 February 2025

Experiments in Woven Bras, Part 2: The Front-laced Specimen

This is a very belated continuation of my first post of this "series". At this point, the front-laced specimen is already worn out and torn out of use, and has been for several years.

It ended up not fitting perfectly - that's the danger of using a well-used old bedsheet with quite a bit of give in it for fitting a muslin of a closely-fitting garment, I think! I completely forgot about that. So if you venture on this sort of journey yourself, use new fabric for your muslins, not old bedsheets? They're fine for more loosely fitting garments, which is why it did not hit me.


Also my figure has changed again. My six centimetres in the bust are back. Frankly I quite liked my sewing D cup, I was used to it, so I'm quite happy to have my six centimetres back. :D

(It's actually also in part to do with the undergarment I'm wearing when taking my measurements, as I found out by putting on an old swim top experimentally. That one got me back down to roughly the minus six measurement, but obviously with a different silhouette. Don't underestimate your undergarments.)

Still, this wearable muslin successfully got me through the summer of 2021 and served as a very good jumping point to finally get it right, figuring out what worked and what didn't. The pluses and minuses.

Minus: One of the major things that didn't work was the fit.

One, I accidentally made it too small in the (front) underbust (totally the fault of overfitting in a fabric with too much give), which is of course where it eventually tore.

Two, the princess seams sat too far out towards the back rather than going over my apex (again, I suspect, the result of overfitting in a fabric with more give).

Three, I put the curved seams on both sides of the princess seam which makes for a bust shape that's rather... Regency. :D (Pointing out to the sides, I mean.) Potentially useful discovery in reference to Regency/1820s stays with princess seams*, but not really a look you want to be sporting in your everyday 21st century life!

* (Modern princess seams usually have the centre piece cut fairly straight and the side pieces accommodating the bust curves, a close look at the famous Musée Galliera short stays shows me it's the other way round around the year 1820.)

As mentioned in Part 1, this is actually the adjusted pattern that led to specimens 2 & 3. But it illustrates the point.

Four, the back turned out to need a bit of taking in at bottom centre in order to really sit flush against my body (and provide even better support). I think that was, in this case, because I stand up much straighter when my bust is properly supported than I did when I created the original pattern (while probably wearing a rather badly fitting bra). However, I also ended up having to take the back in in my experimental Regency wrap bra and in a more recent bra created from a basic block from FreeSewing.org; so I think this particular detail may also have something to do with my recent suspicion/discovery that I have a comparatively narrow back compared to my front and my overall measurements. Not in terms of the over-the-shoulder-blades measurement that's usually considered "a narrow back", I think mine's kind of average for my overall size if not even a bit bigger (I think I do have a bit of a round back going on). But right underneath that point, at the bust / underbust level. Which is precisely what leads to these close-fitting garments having to be taken in at the back - I need to take a wedge out of the bottom hem for proper support.

Plus: Which brings me to a thing that did work in this first bra instance - it did support me. Zero bounce. It kind of flattened my bust, probably sort of in the early 20th century style that this ended up being, and it worked. At least until the whole thing started shrinking and then falling apart... (Or was that due to my bust measurement reduction being only a temporary fluke?)

Minus: Which brings me to another thing that didn't quite work - when I say zero bounce, I mean zero. Zero give. A bit of elastic does come in handy. It's telling that even many Edwardian brassieres did have elastic in the sides...


Aertex bust bodice, c. 1900s, the Underpinnings Museum, ID: UM-2017-001 Photo by Tigz Rice.

For the sort of physical activity I got up to at work (quite a bit of raising arms to reach above my head, actually), a bit of elastic around the straps turns out to be something useful. Not fully elasticated straps like in modern bras, those are annoying... Elasticated sides turn out to be something from the past we should not have done away with!

So yes, those are features I worked into the next step in the evolution of my woven bras.


Plus: What I did quite like about this specimen was the front closure. It didn't work perfectly because I had a fairly short string to lace it (working from stash here, folks), so putting it on was still a bit annoying, and the lacing isn't ideal for wearing under fitted tees. But a front closure really is very nice in terms of not having to fiddle with things blindly while contorting your arms behind your back! Even though by now I'm used to that action and did end up making bras with back closures as my default, I think I also want to try my hand at front-closing ones - both simply because it's a nice alternative, and because, well, accessibility: I think exploring that process could help other people.

Neither quite plus nor minus: I decided that on all future brass I would make the "band" part - the underbust part - a bit deeper/taller so that it grips the underbust better and provides a better "counterweight" to the bust. It wasn't a problem per se, but it is even nicer to wear that way, especially because in these unstructured bras the bust tends to slide down a bit when it's not so flattened. This, I suspect, is an experience anyone with a bust bigger than a C cup is familiar with.


The construction process for woven bras like this is pretty simple: sew the seams, cover the seams with tape (bias for the curves), finish the edges by taping, attach straps. The elasticated panels I started making in later instalments add a complication, but it's still essentially the same.

In this one, I inserted cords into the folded hem at centre front for added strength, and then added handworked eyelets for lacing. The straps, which in this case were just pieces of plainweave tape, I attached with flat-felled seams for a neat and sturdy finish. On principle, as a simple woven bra from a quilting cotton-type fabric, this construction works very well. Everything else I built on top of this basis from now on is just a variation on the theme.

My right strap, in the front, is another place where it started tearing, which I think I can confidently link to all the arm-raising and lack of elasticity.


Further observation: As I suspected, strengthening the centre front in some way and potentially adding more shaping to it also does seem to be rather crucial if you don't want to end up with a monoboob. It's not an accident that Regency stays and Victorian corsets had busks or at least boning down the centre front!

This also happened to be a HSM entry back in 2021, so here's a very belated blog listing for it:

The Challenge: HSM 2021 #3: Small Is Beautiful

What the item is: An experimental 1st part of the 20th century bra.
How it fits the challenge: It's not a big item. 🙂 And it's a pretty necessary part of the whole outfit looking beautiful...
Material: white cotton plainweave
Pattern: my own; the back was hacked from the pattern of my sleeveless spencer, the front is the result of a lot of measuring + muslin fitting
Year: 1910s-1930s.
Notions: cotton bias binding, cotton twill tape (I suspect a blend, actually), cotton plainweave tape, cotton thread that's two 2-ply S twist Z-plied (Hagal), cotton thread that's 3-ply Z-twist (Amann) because the previous turned out not to agree with my sewing machine so I've relegated it to handsewing duty, beeswax for waxing said handsewing thread, twisted cotton cord for cording and lacing (for now, I may change it up eventually)
How historically accurate is it? Meh. It turned out to be a sort of wearable muslin that's all and nothing and not entirely correct for any decade (the whole lacing with cording part takes its cues from even earlier garments, I suspect). But I tested out the pattern (needs tweaking but works very nicely) and the theory of vintage bra construction I've derived from looking at lots of photos of originals on auction sites (because those are usually nice and show details of the insides), and I think I'm definitely headed in the right direction here for being able to make 1930s-style bras for both modern and vintage wear, and hopefully also an even more correct 1910s-style princess-seamed bra.
Hours to complete: Not sure. It took several days, not of full sewing, in part because my machine was acting up (which thankfully turned out to be a thread problem)
First worn: ... not sure which day exactly it was, I've now been wearing it for about two weeks. (June 26 2021)

Total cost: Cost of materials lost to the mist of time. But it would not be much. 


Next up: Another dead end. The first elasticated attempt which with all the adjustments for that it took waaaay longer to make than it should have and remains unfinished and abandoned in favour of simpler, better fitted, more sturdy specimens. I made it in a fabric that was too flimsy. Woven bras are one garment type that quilting-type cotton is perfect for! And I planned the placement of the elastic in the elasticated section wrong, so it did not have the necessary grip in that area.

I'm going to document that attempt even when it failed, because it's still a good demonstration of the principles of woven bras that I discovered along the way. As the Czech saying goes, mistakes are how you learn.

Wednesday, 30 June 2021

Experiments in woven bras, Part 1: The reasons and the initial process (and mistakes)

I've been fed up with RTW bras for quite a while now. The ever-present artificial fibre (even if the bra is mostly cotton, the various findings are not). The fact that I'm nominally one size but then when I try it on the cups are gaping. The fact that I have to keep searching for styles that are both as much natural fibre as possible and a cut that does not result in gaping. The annoyment of the sliders of adjustable straps often ending up sitting right on top of my collarbones, which can be a lot of fun (insert sarcasm) especially with a backpack on top.

I first started out, years ago, basically trying to replicate RTW underwire bras, and it never worked out. Eventually I found out, thanks to a random commenter in the Curvy Sewing Collective Community group on Facebook, that part of my problem probably is that I have Omega-shaped breasts - or something of that sort, anyway (what that article describes doesn't fit me on all counts, I also have top gaping and have never struggled with the bottom of the bra sliding that much; but more or less it does fit). So the standard cup setup probably simply doesn't quite work, even if I had managed to get it "right". (If you do not have that problem, and want underwires, I think the free Maya bra may be a good starting point for that sort of thing - the author says the whole front of the pattern can easily be made without any stretch, so if you combine that with some sort of vintage-style elastic setup in the back, you're probably good to go.)

(I would have shown you my most recent unsuccessful wearable muslin here - complete with self-made bias channels for underwires - but I think it went into the rubbish bin during last year's move. It did not sit right. It did at least serve to drive home the fact I really want to wear woven natural fibre bras in summer.)

And then last year I came across this review of the Vera Venus 1940s bra and realised, over that bra's clearly fabulous support, that proper vintage-style bras might be a much better solution for me. Especially because I had been wearing exclusively wireless in RTW bras for the past couple of years anyway and my absolute favourite, fit-wise (sadly not material-wise), was this rather vintage-style number from Marks & Spencer

I lifted this image off the interent somewhere; maybe the Czech M&S site. I normally don't do this. But links break, especially shop links, and I want this blog to serve as a record for posterity and to help people regardless of when they find it. And this image shows the seamlines in relation to fit relatively clearly.
 
Note: shaped cups, fabric around them and full coverage, and - as you will see bellow - taped seams. Those seem to be the crucial elements of support in here to take note of. Also, note central front seam. I don't know if the "grainlines" there also serve a purpose but what is certain - that seam is also taped.
 
It's wireless but it's not woven - I think the cups are some kind of tricot knit? They say it's part cotton and therefore nice to wear. Don't believe them if you have skin trouble and sweat trouble. I definitely sweat in it unpleasantly when it's hot.
 
So, as you can see, the seams are taped. With something that definitely isn't cotton. There's also some kind of mesh fabric under the cups on the inside (it does not look like the power mesh I google but presumably it serves the same purpose). Also definitely not cotton. Aaaand exposed bra elastic.


Sadly far from ideal in my world, even if it is much better than anything else before, and very instructive.
 
So I:
  • Collected lots of pictures of vintage bras (mostly from auction sites) in a secret Pinterest board (which I may eventually un-secret for general use but for now it's a bit too personal a research, complete with non-historical related material ideas etc.), and took mental notes of cut and construction.
  • Went ahead and drafted some patterns last year, based on my measurements in the above-mentioned M&S bra. Which were both (pattern and bra) subsequently, quite soon after I made that effort, rendered obsolete by my losing a whopping 6 cm in the full bust measurement due to a change of jobs (more movement & different food, and my body seems to primarily store fats in my bust area to begin with).

Bra calculators tell me, right now, that I ought to be 30F or 32E in UK bras (my underbust measurement is currently closer to 29 inches, BTW). Which I'm pretty sure would gape a lot in reality. I wore 32DD previously; the bra I have is 34D (I could not find 32DD in the shop when I bought it, so I did the improper thing of buying the upper sister size and wearing it on the farthest set of hooks). It's gaping in the cups now (and as you may guess from the above list of sizes, the band must be too big now). Presumably I could get away with a C or D in this style now?

But: material. I used not to have such a big problem with blend bras, skin-wise, but during the last year I got rash problems in the bust area as well. I don't know, maybe it was the stress of the past year - apparently atopic ecsema gets worse with stress, and let's face it, the past year plus has been... A Thing.

So. Time for more bra experiments. Especially because summer's here and the knit and partially-artificial RTW bras I have, currently also badly fitting, just really don't cut it anymore.

I drew on my knowledge of historical bras - from the Lengberg style and Katafalk's recreation of it through 1910s princess-seamed bras to 1920s and 1930s bras - and took lots of measurements and made an initial draft that I then refined the fit of in a muslin (considerably).

It turns out, as I sit down to document my process, that my initial princess-seamed draft does not exist anymore. Nor does the subsequent muslin-influenced draft because the garment that resulted from that is still faulty. In an attempt to be a good girl who cleans her room, I threw those patterns away immediately upon their becoming obsolete, without documenting them. Oops.

Anyway, here's my back piece, derived from my sleeveless spencer, which exists still mostly unchanged - I just took it in a tad from the top of the underarm area for better support, and I think I scooped it down / out in the underarm / armscye in general? The side seam sits a bit more towards the back than directly under my arm, incidentally. I didn't bother correcting that; it works better with the grainlines this way. (There are additional straps connecting the front and back, BTW.)


And this is my initial Lengberg-style front piece, not yet muslined, which is basically where I started - by drafting this flat piece out of my measurements, with breast cutouts, because I could hold that against my chest and roughly "test the fit" even in paper. (Considering my further fitting problems, I suspect this is inaccurate.)


From there, I drafted two princess-seamed pieces following that vertical line, both with a "bulge" for the bust, based on measurements of my breasts.

And then I made a muslin of that, with a front opening, and pinned and pinned. The bulge was reduced, more so on the central front pieces, but really both of them. I generally took in the seams for better support.

So I think you could basically arrive at a similar thing just by starting out with a vertically princess-seamed pattern for wovens, exactly as The Dreamstress recommends for 1910s bras.

I made a wearable muslin with lacing in the front (that will be Part 2), and found out that, oops, my muslin fabric was an old bedsheet and old bedsheets have considerably more give than new fabric so I had taken it in too much, especially in the underbust. Fortunately, the lacing takes care of that gap, and it definitely is a wearable muslin and already far nicer to wear than my RTW numbers. But - it needs improving.

So this is my pattern for the front with those further changes taken into account (and some sort of basis for a bust cup drawn in tentatively): 

Which will presumably go into a Part 3 of this adventure, this time with elastic. We'll see how many parts will follow after that. :D

Saturday, 15 May 2021

HSM '17 #2: The c. 1800 sleeveless spencer / bodice

No, that's not a mistake: it really is a make from 2017 (in its final finished state). There's really a lot I've never gotten around to blogging about...


Once upon a time, I fell in love with the 1802 portrait of Heinrike Dannecker by Gottlieb Schick, and decided I wanted to make an outfit inspired by it - really possibly my favourite portrait from the era, fashions-wise, as I've already mentioned.

Then later I came across two other portraits involving sleeveless bodices that I took inspiration from: this ca. 1795 miniature by Augustin Dubourg and the 1800 portrait of the Comtesse de Bonneval by Anne-Louis Girodet de Roussy-Trioson which was good for figuring out how the front would sit at a slightly later date than 1795. :-) (Links to Pinterest because the original links are broken.) - Yes, they're both blue worn over white dresses. My colour bias is showing.

I had some fabulously shiny cotton satin upholstery fabric that I had snatched up from a remnant bin and that seemed to want to become this sleeveless bodice. Red! Shiny for evening wear! So wonderful.

I played with the pattern for my transitional "bra" to turn it into a front-lacing bodice, and as I placed it on the fabric, I thought "maybe I could squeeze two things out of this fabric" and pieced the front to accommodate a more tetris-style pattern placement.

I ended up shifting the grainlines in the three front-and-shoulder pattern pieces in comparison to the "bra". Since it was my own experimental pattern it wasn't exactly set in stone anyway but:


I find that shifting grainlines when altering and piecing historical patterns is actually mostly OK - as long as you keep your grainlines mostly the same / symmetrical on both sides of the body, don't remove bias from where it serves a purpose, or don't put bias somewhere you really don't want to stretch out! (Which was actually why I shifted it on the shoulder strap pattern piece: I wanted it lying nicely along the grain. That oddly shaped front bit got its grainlines shifted just for the sake of placement on fabric, though.) When loking at the patterns in the priceless German disertation on the Kostümsammlung Hübsch by Johannes Pietsch, I realised this was done historically, too, with pieced garments. So in that context, you can totally shift grainlines away to your heart's content!

I sewed the bulk of the seams by machine because I was excited and wanted to finish this bodice faster than my previous historical makes (four years is a rather excessive precedent and is stretching one's patience, once the undergarments are already done). Then I got the bright idea to fell stitch / whipstitch (?) the seam allowances down, which turned out to be not very brilliant actually because it resulted in ridges on the outside (thick upholstery fabric). But I kept it that way while I was ahead...

The lacing eyelets were rather a pain. The thick upholstery fabric was so hard to make proper awl holes in! And deciding to use buttonhole silk twist didn't help - it's bulkier. Though also neater, even if mine turned out to be lighter in colour than the fabric.


Thankfully, I decided to lace it with a cord I knitted myself out of cotton crochet yarn, with two stitches only (just like lucet, without a lucet), which is thin enough to pass through the resulting tiny eyelets (a large blunt needle in place of a bodkin helps, though, although it also passes through with more difficulty).


I spaced the eyelets as suitable for spiral lacing - although looking at Comtesse de Bonneval, I clearly could have gone with a regular criss-cross placement; I somehow forgot that part. (I need to work on keeping my inspiration images and sources before me throughout the process of working on things because that sort of thing happens to me far too often.)

I made a thread bar on the inside at the top edge, also from my buttonhole silk, to tie one end of the lace to. The bottom end of the lace I originally usually led back up underneath and tied to the thread bar again as well. When I had a not-lacing-tight kind of day (like when I wore this over a modern bra to church...), I just tied that end off at the bottom. Then that became the norm because my bust had grown about 6 cm since I first made the bodice... and now I've lost some cms there again, though not the full 6. But that's the flexibility of lacing for you! :-)
 
Originally, I only finished all the edges with piping. I don't even think it’s historically correct for the period anymore (maybe it's only an 1810s-onward thing?); and in either case, the folly of using an ahistorical thick upholstery fabric this way became apparent
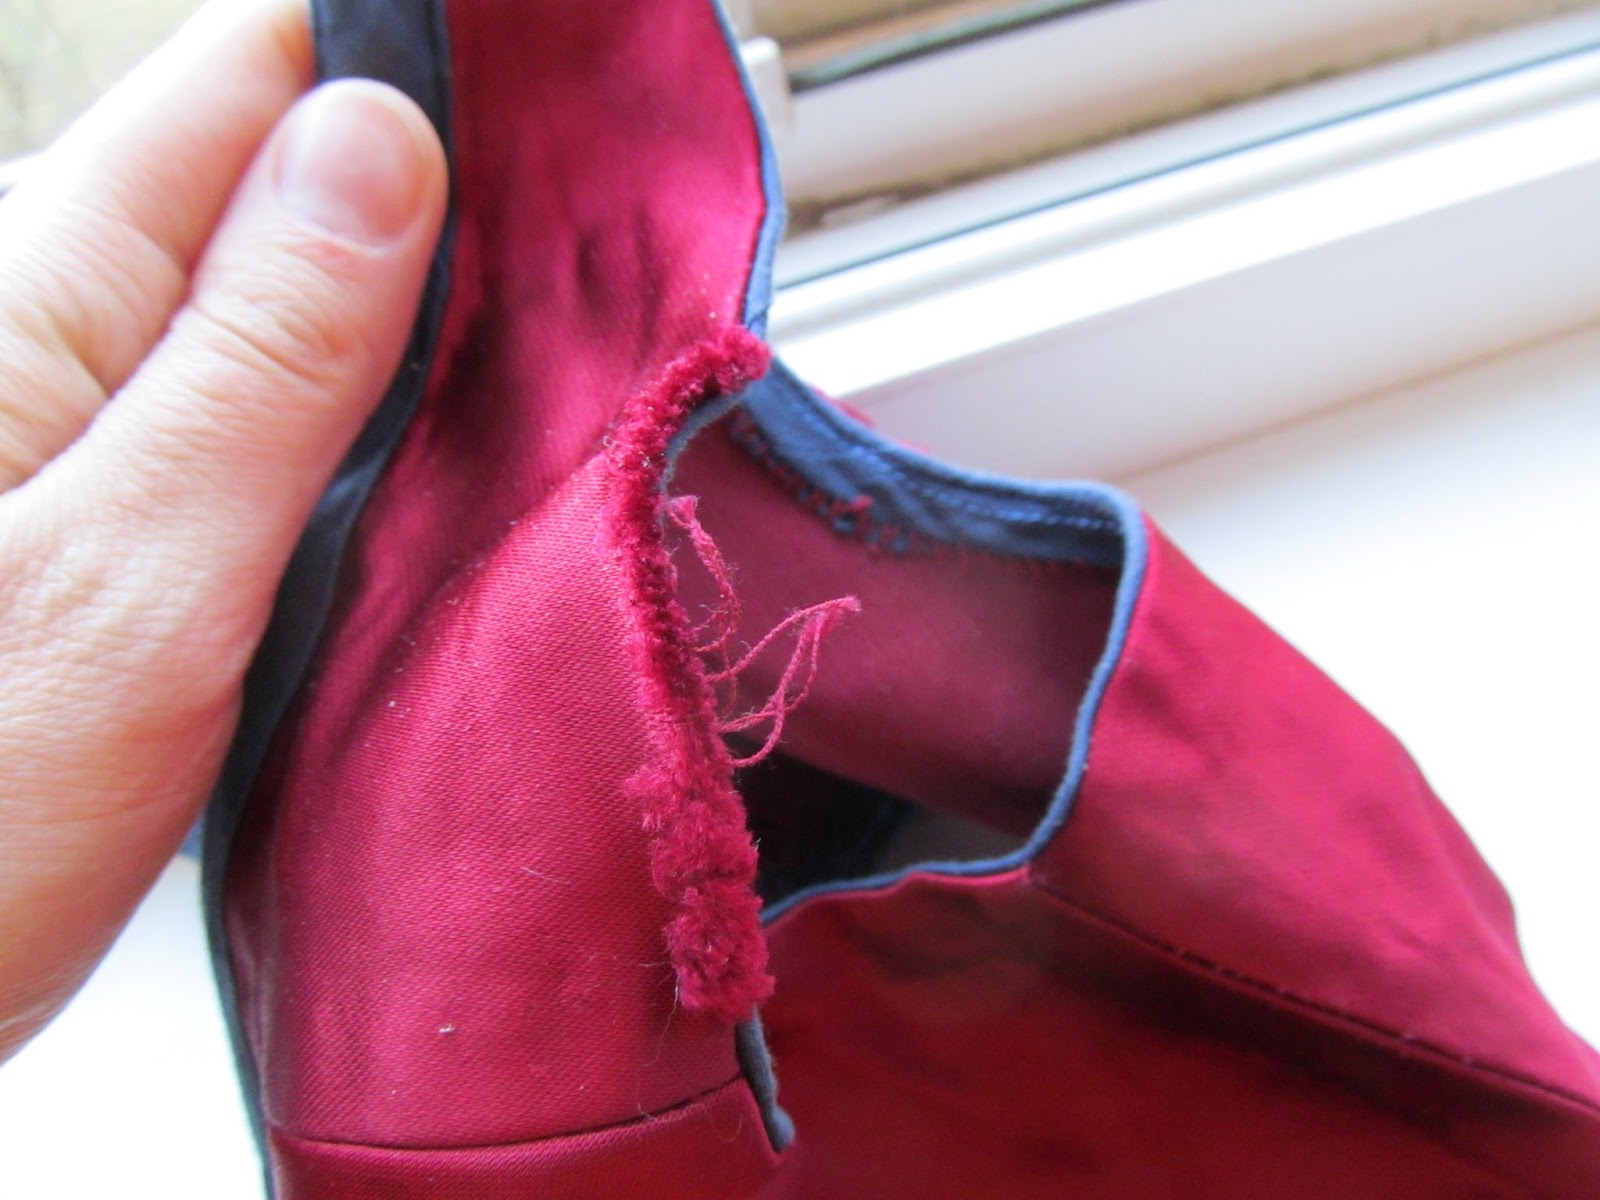
soon: the fabric ripped / unravelled in several places at the edges in the first wash, before I even had pictures taken. (All the photos in this post were taken during the restorative process or afterwards, I have zero pictures of it in the only-piping state...)

ETA: The problem is that, in order to turn the seam allowances around the curves, I had to cut them quite narrow and - well, the thick fabric is simply not suited to that sort of treatment, together with the thick turn of cloth it puts too much strain on it, and the fact it's a satin (= a somewhat looser weave) did not help...

 
I was grumpy about it for a bit, because it ruined the clean look I was going for, but then I caved in and added more trim to save it / cover it up: bias strips whip-stitched (fell-stitched?) to the piping & stitched down with backstitch on the other side, and bias binding at the lacing holes in the front.

So that's the whole of the lesson of not using historically accurate fabric and historically accurate techniques. :P

(More historically accurate fabrics would also likely result in the historically accurate wrinkles one can see in the portraits...) 

ETA: Notice that the bottom edge, which isn't so curvy, survived my piping treatment unscathed, presumably because I did not cut the seam allowance as closely as I did around the curves and the lacing holes at the front openening.


Anyway. Despite the problems, I'm happy with it. I'm particularly happy with the basic shape of the pattern, because that looks exactly the way I wanted it to look. It looks so good I could not believe it when I first saw myself in the mirror and later photos... It sits just like the bodices from the portraits. It's a very satisfying experience to get that result without the jumping board of a pattern taken from an extant garment, with something you just kind of eyeballed.

This is a photo by Páv Lučištník, so far the only good one I have of myself in full Regency getup... my tendency to forget to put on jewellery strikes often! :D So does my "RBF"; for some reason the photos of myself from the events that I know of always make me look bored even when I know I was anything but! Here I was looking at the people dancing and apparently previously tried to take some photos of my own. It's back from the bodice's first outing in its altered state in February 2017. I think I need to revive that headdress style...

So I'm totally going to one day make another one in similarly rather inaccurate cotton velvet, with hopefully more accurate construction techniques. I was originally thinking of a blue velvet remnant, but now there's the Purple HSM challenge and I thought back to the purple velvet... and there's Vanessa's oh-so-pretty printed cotton one... aaand I have some thrifted silk garments intended for repurposing as accessories... so, considering how easy it is to make this garment out of remnants, I suspect I'll eventually end up with a wide choice of sleeveless spencers to spice up my Regency ensembles. :D

I also want to eventually share the pattern (because it turned out so well!), but this post has been in limbo long enough and I don't want to keep waiting till I finish digitising the pattern... especially because it occurred to me that with how simple it is, it may be a good training ground for improving my grading skills...


Just the facts, ma'am:

What the item is: “Regency” bodice / sleeveless spencer
The Challenge, and how this item fulfils it: HSM '17 #2: Re-Make, Re-Use, Re-Fashion. I used trim to save / cover up fabric damage.
Fabric/Materials: Marked down remnant of red cotton upholstery-weight satin (NOT recommended, with emphasis!); navy blue lightweight cotton sateen for trim (pretty great!)
Pattern: My own, an evolution of my wrap stays / brassiere.

Year: c. 1800
Notions: red thread (polyester, I believe), dark blue cotton thread; red buttonhole twist for the lacing eyelets & a thread bar on the inside which I tie the lacing to; dark blue cotton crochet yarn knitted into a lacing cord; thin linen cord for the piping.
How historically accurate is it? Meh. Fabric is wrong, some of the methods are wrong (it’s even partially machine-sewn). On the other hand, the shape is pretty spot on on me, so that’s a plus. Also, the Re-Make part is pretty good: using trim to cover up damage is a valid thing, bias strips as trim are valid as far as I know, and the handsewing stitches I used (backstitch & fell stitch) are valid.
Hours to complete: No idea whatsoever. Sewing down the trim at one armhole (cca 52 cm) took about 1,5 h, I think?
First worn: In the original state, for the first and the last time to a production of King’s Speech by the National Theatre in Brno (an occasion that seemed to call for an evening dress, so I used the best I had :D). In this new iteration, to the “All in the Garden Green” ball held by Jane Austen CZ on February 25 2017 in Brno-Tuřany. And then many times afterwards, not all of them historical occasions, either.
Total cost: Low. I don’t remember how much any of the materials cost anymore, but in any case, the red fabric was marked down and I only used about half of it, the blue was cheap to begin with and I only used a bit of it, and there wasn’t much thread or yarn used, either. All in all, I’m guessing about 70 CZK ( = less than 3 USD)? The cost would go up if I did it more correctly and used a thinner, historically accurate fashion fabric coupled up with a linen/cotton lining.

Tuesday, 17 November 2020

Drafting sewing patterns in Inkscape: Setting up your grid

If you want to draft patterns in Inkscape (which is a free vector aka line-drawing program, aka the free alternative to Illustrator), your best bet is to start by setting up the auxilliary grid. I find that with the help of grids, I can turn paper patterns digital even without mucking about with scanners (which I don't have myself) and the correct resolution - more on that later, hopefully. But the best part for us historical costumers? If you set up your grid right, you should be able to do scaled patterns or draft those block / apportioning rulers drafts straight into your own measurements. (With the caution that things like bust cup sizes still won't enter into it - always do mockups.)

Although that's a step too far if you don't yet know how to set up the grid to your specifications. Which is something I've only just discovered how to do properly myself, so I'm happily sharing.

I'm sure there are other tutorials for this out there; but I often find it's easier to read tutorials written by someone coming at the problem from the same angle as you... so here's from a pattern-drafter and historical costumer to others.

Here's my sleeveless spencer pattern, digitised with the help of Inkscape grid, still missing its side piece for some reason. I'll have to look into why I stopped at that point; I suspect it's because I lost the paper pattern...

Now, up front, I'm Czech and my Inkscape is in Czech, so sadly I'm not always sure about the exact English terminology. If you have the same version of Inkscape, things should hopefully all look the same, though. Mine is 0.92.2 (5c3e80d, 2017-08-06). (Which reminds me maybe I should look for an update.) You should find yours in the Help section under About or some such.

So, yes, I've only just figured this out properly. In the post about drafting a corset from pictures, I mentioned that I had trouble switching my grid to milimetres... It's because when you change units, Inkscape is clever and retains the dimensions of your previous grid! :D

Setting up your grid is easier when you work in metric. You don't usually have to worry about divisions much - Inkscape works with decimal numbers, and your units work with decimal numbers, so it's quite easy.

Inches require more math and theoretical mathematical thinking. Which goes to show that inches are an older unit from a time when people just did things with physical measures that could be folded in half, instead of with mathematics in their heads...

So, to set up a grid for the first time, you go to File Properties, under the Grid menu, and set up a grid by choosing the type of grid you want (apparently it's "Rectangular" in English) and clicking "Create new".

(BTW: If you want to draft hexagonal patterns for patchwork, the other type of grid can help with that - which is something I should have realised about a month ago when I mucked about and struggled with trying to draft out the Golden Wedding Ring block...)

Make sure you have checked that the grid is turned on and visible (important!). The last option says something like "snap only to visible grid", which means that if you zoom out enough that you can only see your major, red lines, your nodes will only snap to the red grid.

And then you define the exact properties you want your grid to have.

Once you have once set up a grid, you can just turn it on or off, and just change the properties as needed - unless you want the other type of grid, or unless you removed / deleted it somewhere in the process, in which case you have to create a new one again.

This is how I get a "milimetre paper" effect with my unit being milimetres:


You go to the Grid menu on the right, choose your unit, and then decide at what intervals you want your lines to be. As you can see here, I chose to have my basic, blue lines at 1 mm and my major, red lines at 1 cm. 1 cm is 10 mm, so that's easy. Your basic lines will be at every 1 whole unit, in both directions (along the X and Y axes), and your major lines will be at every 10 lines (that's the last setting there at the bottom).

You can also check (bottom left) that you want your grid to display only as dots rather than lines. But personally I find the lines much easier to see and work with.

Note that whenever you change any of those numbers in the menu on the right, you have to hit Enter or click in another menu "window" for the change to take place. Other than that, it's pretty straightforward.

Where it starts to get a bit confusing is when you decide to change units. If I switch my units to cm, I get this:

Suddenly my lines are at every 0,1 of my unit (since 1 mm is 0,1 cm). My major lines are still at every 10 lines.

This is why I had trouble getting mms out of my grid when drafting my corset pattern - I did not notice that the numbers had changed when I switched units, so I could not understand why the grid resolutely stayed the same...!

(You could also change where your grid is centered on the X and Y axes. Those are automatically centered in the left bottom corner of your page. Messing with that is more trouble than it's worth for our purposes - we don't need that because frankly the page does not enter into the drafting process at all the way I do it - except maybe as a rough gauge for how many pages the printed pattern will take. If for some reason you wanted to change where your grid is centered, you would have to know the exact coordinates of the point where you want to move it.)

Of course, you don't have to have your major lines at 10. I can do a "half-centimetre" version by setting them up at 5 mms:

The only thing that bothers me about this system is that I'm limited to two types of lines, so I can't have both a detailed "milimetre paper" and mark 5 or 10 cms as well. If I want that type of super-helpful grid, I have to add more lines manually... which can interfere with my drafting a bit as those "objects" get in the way. Maybe there's still a way around that but I haven't figured it out yet...

Now, inches. As I said, inches require more math.

To help you, the various divisions translate into decimal numbers like so:

1/2 = 0,5

1/4 = 0,25

1/8 = 0,125

1/16 = 0,0625

And if you're math-and-numbers-challenged, you can write down those numbers or print them out on a piece of paper to stick at some place where you'll have it in sight and won't lose it.

(You can get those numbers easily with the help of a calculator by dividing 1 : your division number. If you need, say, 3/8, you then just multiply your 1/8 decimal number by 3... But part of the point of setting up our grids in Inkscape is that you avoid that further multiplication and just use your grid as a ruler.)

So if you want an inch grid divided down to sixteenths of an inch, you set it up like this:

With your basic lines being the decimal number for 1/16 (i.e. 0,0625) and your major lines at every 16 lines.

Just for fun: Because Inkscape goes that detailed with its decimal numbers in these settings, you can go extra-detailed with... what is it called, thirty-secondths?

And now you can give Vanessa's tutorial a whirl regardless of whether your pattern draft uses cms or inches.

As a teaser for how you would do the apportioning rulers stuff: Your X and Y measurements don't have to match.

Here's the same grid in inches:


So... yeah... just with some help from a calculator (you most likely have one on your phone), you can totally do the apportioning rulers drafts to your own measurements. Or create your own apportioning ruler / tape measure for doing it by hand. But more on that at some later point...

Wednesday, 7 October 2020

How NOT to draft a women's sloper: Why the FreeSewing.org Breanna sloper for women does not work at all (unfortunately)

In the loquatious manner of old books, the full title of this blog post continues:

Containing therein an explanation of the fundamental importance of the difference between dart width and dart angle.
Or
What shenanigans Marmota gets into when she has too much free time on her hands and wants a quick solution to something (Spoiler alert: It was anything but quick.)

I have to say right ahead that this was written back in May so some of the info about how the FreeSewing.org site is set up here is dated. The problems with the pattern remain exactly the same, though.


I also have to say right ahead that the sum total of my knowledge of programming is a neat zero, so I have no idea how the actual code works and cannot unfortunately fix it.

I do, however, by now know a thing or two about drafting sewing patterns, and about measuring and altering them to make sure they fit - seeing as I'm exactly the sort of non-average person FreeSewing.org is targetting:


In their system, back in May, the closer you were to a standard size, the more your diagram looked like a perfect circle. Mine was a perfect splotch.


So I can at least offer an explanation of why it doesn't work. Why the way they take those detailed measurements (that for the most part do make sense to me) and turn them into this pattern... results in a pattern that does not work at all. Long story short: the very base of the women's sloper is flawed and does not seem to take into account some fundamental truths of sewing and pattern-making.

Namely how you deal with darts and angles.

I hope that this post will both work as a (very detailed) review for other existing / potential users to see exactly why that particular covetable pattern (custom slopers are covetable, right?) doesn't work right now, as well as hopefully help the programmers do things better in the future when it comes to women's patterns. Because I do love the idea of OpenSource patterns!

(And maybe it will also help explain some things about drafting your own slopers. I learned a lot from this myself.)

Monday, 11 May 2020

Throwback: The Andrea blouse and pattern

This dates back to the era of BurdaStyle as a website for OpenSource patterns, and BurdaStyle as a sewing community. Digging back, it seems I made this blouse in 2008? Definitely finished it in 2008. It predates this blog, and was actually one of the first items of clothing I ever made for myself... preceded by a "medieval" (ha-ha) dress and an evening dress! I always had a habit of jumping headfirst into sewing projects without regard for the order of their perceived difficulty ratings. :D

In retrospect, it's absolutely no wonder I've developed the sewing persona and habits I have if, out of the first three garments I ever made for myself, one was drafted based on a scaled draft, one was made from a heavily altered pattern, and one was a completely new design drafted from a basic sloper! There's no way I was ever going to end up the sort of sewist who buys and has to try all the newest patterns! :D

 Old photos demonstrating that my habit of wearing headscarves is already more than ten years old... and that my problem of finding well-fitting RTW trousers is a lifelong one.


That era of BurdaStyle as a sewing community is now definitively gone. Just like the blouse.

The physical object no longer fit me, and was worn and the colours washed out... so recently I cut it up and am in the process of turning it into patchwork pillowcases for my sister. Well, technically, I would be far more in the process of if the project were not currently 180 kms away...

(I wasn't even in the habit of visiting the BurdaStyle site for the past couple of years, so I was surprised to find out it was completely remade when I ventured there recently - I'm not sure when the change happened. But everything is gone. It's truly and fully nothing but a shop now, and as you can guess from the previous paragraphs, I definitely don't need it.)

This blouse was my first pattern of my own, drafted from a basic sloper (provided back then by BurdaStyle user JJ), based on my own design, my own idea, and so it will always be special.


The original idea counted on colour blocking or at least several colours / patterns of fabric, which I eventually scrapped in part because I did not have that many coordinating fabrics of the same type. I also played with the idea of back lacing which I think was quite "in" at the time (also, hey, I've always loved historical costumes), and scrapped that because, well, back lacing isn't very practical.


Also I named it after the little girl who was baptised the day I finished it, so even though I'm not sure how many times I've even met her after that, it is a rather specially named pattern that way.


 And as you can see, I eventually adjusted the back seams to echo the front more. It's much better balanced that way! And more fun! I dislike patterns that have inventive designs in the front and boring standard seam / dart configurations in the back.

The blouse used to have a record on the BurdaStyle site, including a single-size PDF download of the pattern, but as I said, that is now gone, and the record only lives on in the Wayback Machine  - without the PDF (and including my early confusion concerning invisible zippers if you go further back in history :D - it was a regular one). Plus there's my old Czech blog post - now picture-less. ETA: Actually, now that blog is gone, too (the platform is gone), and only lives on in the Wayback Machine.


I forgot to take more photos than these original ones before I took it apart. So you only have my word for all the beginner mistakes I made... such as trimming the seam allowances too fine as I zig-zagged them (together, too, I suspect - you can kind of see that it even affects the fit in the back), before I even tried it on properly. It wasn't that a big problem with this piece, but it's not a habit you want to maintain in general. :D

There's also the matter of my not knowing anything about understitching - so I topstitched around the neckline instead. Again, not a big problem with this casual blouse but not a habit you want to get into in general!

And somewhere between my forgetting some details from the drafting tutorial, the block I used having come without sleeves, and my generally not yet knowing the wisdom of measuring patterns against my own measurements, the sleeves originally ended up a tad too tight - so the underarm gusset was a necessity. One I fell in love with, though. :D


Looking at these photos now, and remembering how I did things compared to what I now know about my usual adjustments, I think I probably should have lengthened it in the upper part / lowered the bust point / raised the shoulder seam, too... I suspect that was also part of the reason the sleeves originally ended up too tight. Not having done that, however, does make the resulting pattern a bit more usable as a general pattern. :-)

... I kind of forgot about my old Czech blog; I don't use it anymore because that old Czech platform is pretty clunky. I now found out there that the thrifted pillowcase from which I made the blouse cost only 5 CZK (!!!), and that the yellow fabric I used for the teeny piping along the sleeves cost 10 CZK (and it cycles back to today because I think I have now used some of that fabric for face masks...).

That blog post is also a bit cringe-worthy because I had frankly no idea what I was doing or how to write about these things in a logical manner. :D

Pattern!


I retained my habit of drafting patterns on newsprint ads for many years after. I don't do it anymore, in part because we don't end up with them in the mailbox anymore (or only rarely maybe?). But it's actually not such a bad habit - if you don't mind drafting on already printed things and having to peer closely to see your lines! :D (I would always do the final markings in a black pen.) Re-using useless stuff isn't a bad thing to do; these days I still have a habit of e.g. taping together office papers printed from one side...


Here's the original pattern, as-is: Drafted at Burda size 38 in the bust (88 cm), c. size 36 in the waist (66 cm), widening back to size 38 (94 cm) or even 40 (98 cm) for the hips; the bodice lengthened in the waist to fit my long torso, and pretty narrow sleeves. No seam allowances.

Download original Andrea blouse pattern

I have an ambition of turning it into a more standard-size multi-sized one - but I'll leave that for the future (because it would hopefully also involve sewing a new version for myself and doing some sort of tutorial!).

Friday, 2 August 2019

HSM '19 Entry for Challenge 7 - Unexpected: My sister's Moravian Wallachian bodice


What the item is: Moravian-Wallachian bodice for my sister

What is the unexpected feature? The colour blue. These days, the typical Moravian-Wallachian folk costume bodice is red (usually with green or gold trimmings). But in my research, I found out that's actually only a c. mid-19th century development; before that, red dye was more expensive and red bodices were only worn by well-off women, and for special occasions. One of the colours more common historically was blue, and as we hacked out the ideas for her costume with my sister, we found out she really liked the earlier version of it.
(Also, strikingly, it unfortunately came out much darker and brighter than expected - my inexperience with that brand of dye shows. :P I did use about 1/3 recommended amount as per Jacquard's instructions for "most saturated results", but apparently I should have used much less... :-( )
Here are two modern reconstructions of blue bodices in Moravian Wallachia in the beginning of the 19th century that were our primary inspiration for this - and show the sort of colour I was actually aiming at. :P The first also shows an extant picture - originally published in a book I unfortunately don't own.

Material: For the outer, overdyed cream wool worsted (a sort of brushed twill?) strengthened with woven cotton iron-on interfacing to roughly imitate wool broadcloth with my resources. Lining is a cotton-linen blend I bought in Ikea about ten years ago.

Notions: Dark red polyester satin ribbon for trim (sewed on with wrong side out to lessen the shine). Blue cotton thread for machine-sewing the outer, white cotton thread for machine-sewing the lining, white linen thread for handsewing the lining in, dark red silk thread for sewing on the trim. Blue linen buttonhole twist for sewing on the buttons. Dark red silk buttonhole twist for buttonholes & the embroidery in the back. (All links to Sartor, because they ship all over the place and I'm pretty sure they carry the same brands I used; but I only bought the linen thread there myself.) Metallic filligree shank buttons. (The plan is also to add hooks and eyes in case her figure changes, but I haven't gotten around to that yet.)

Pattern: My own, based on lots of Wallachian bodices viewed online, most of them not extant. Derived loosely from the basic bodice & princess seam tutorials by Bilikis Signatures on YouTube, because her simplified drafting methods struck me as a good starting point for a more rural garment; but I drafted front & back separately, because my sister is very busty. Then tweaked in mock-up.

(The centre front is actually cut on grain.)

Year: c. first half of 19th century

How historically accurate is it? About 50/50, I guess. Colour came out a tad too chemical. Material is mehish, though not too bad for our budget constraints & what's readily available (I'm not happy about the polyester trim, but the rest works quite well). Pattern is an educated guess. Machine sewing on seams & straighter bits of trim to speed it up. Aside from that, the construction method is plausible but not documented, and I think I made some mistakes because I was figuring it out as I went. I am not certain about the embroidery in the back, its existence is also a bit of an educated guess - I couldn't find any back pictures of extant bodices or historical depictions from the back; current bodices mostly have pom-pom-like decoration there but there are also some embroidered ones, and my sister wanted her bodice as smooth as possible.

The folds were, at first, delightfully neat - sew vertical seams, clip into seam allowance, fold, stitch seam allowance at the top of fold without stitching through to the outside, press.


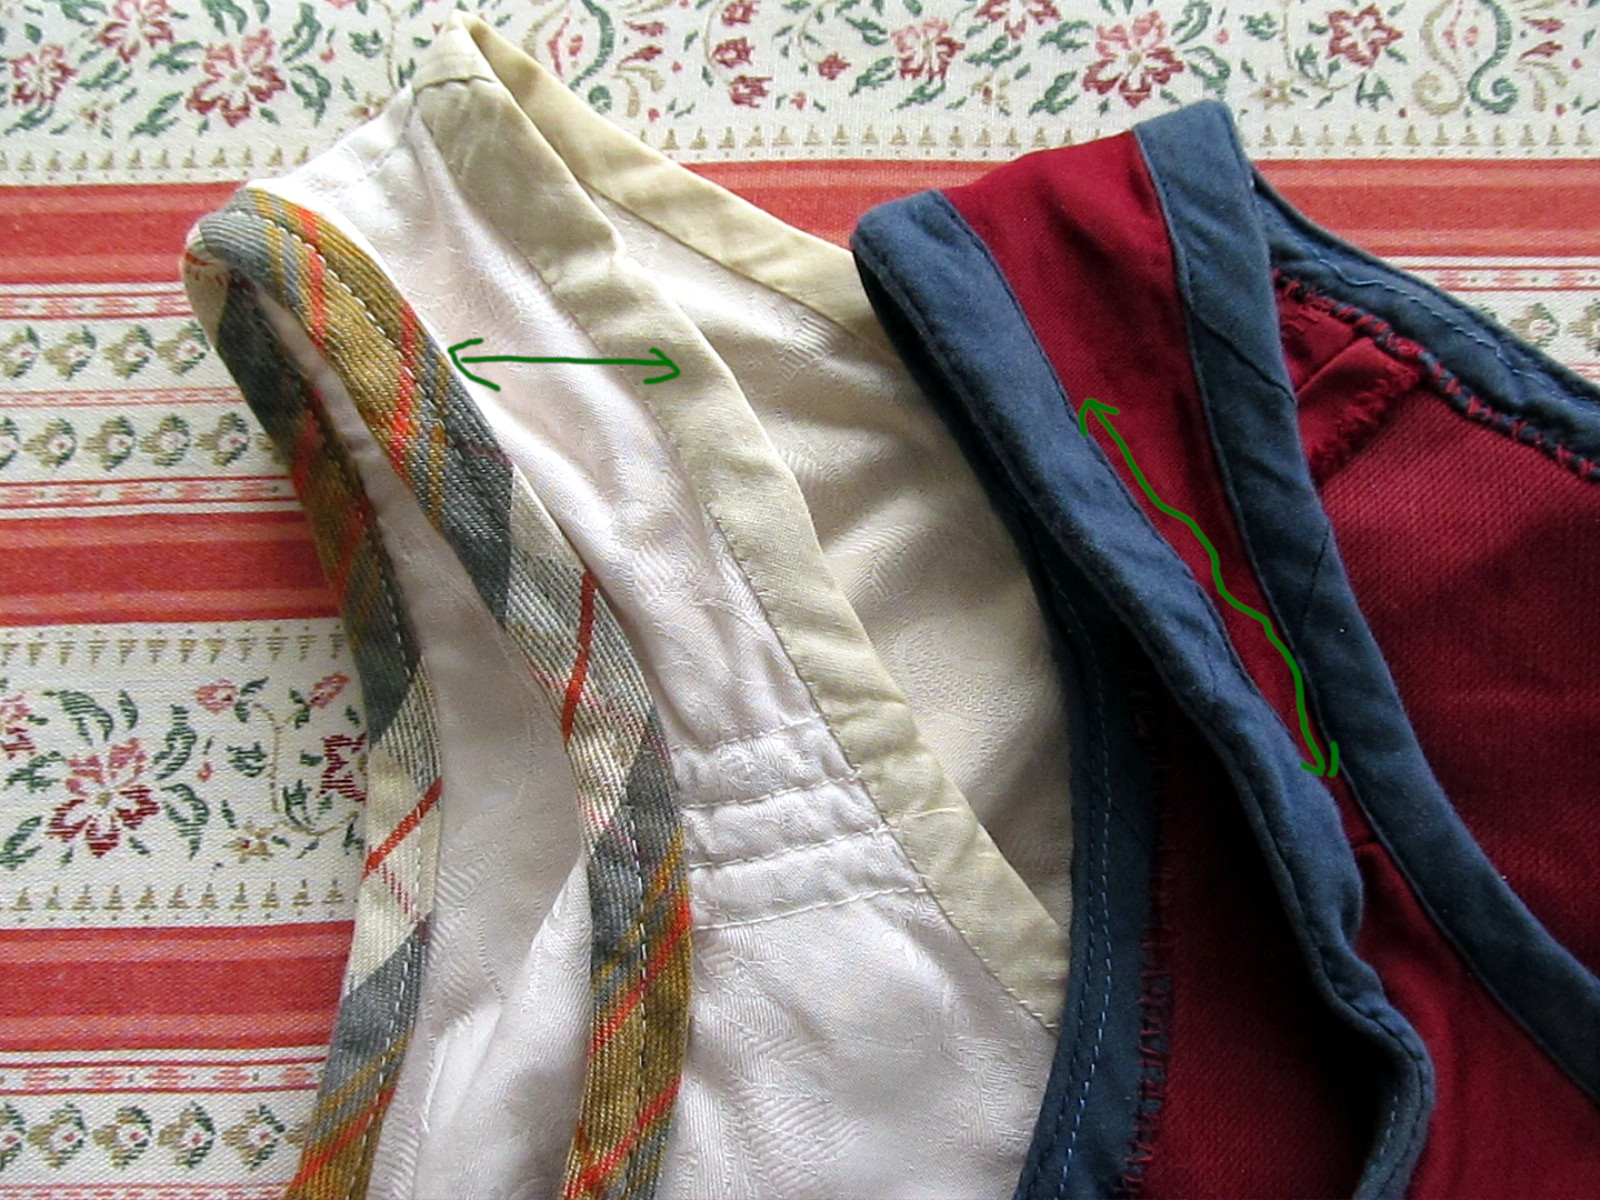
The outer and the lining were sewn separately - I pleated the folds in the opposite diretion on the lining, without sewing down the top, and then I pressed the edges down and fell-stitched the lining in. This created a problem with the folds, however, in part because I had done a stupid and embroidered over them before I sewed in the lining - so it was even messier than it would have been anyway. (I've forgotten that I still want to sew pieces of fabric over the top inside to clean it up and secure it... see below how rather messy it is at the moment.)


The embroidery, though, makes me quite happy despite. I stitched tight triangles of overlapping stitches right above the folds to secure them, and then did a little decorative embroidery above it, in a bit of a spruce-branch pattern (or chicken feet, depending on how you look at it...) to echo the embroidery of spruce branches my sister made for her shirt.


(Callback to that post: As you can see now, I didn't interface this with downproof ticking in the end.)


Hours to complete: About 2 days for fabric dyeing & pattern creation & prep, about 3 days of rather intense sewing.

First worn: Not yet. It was meant to be worn at the final promenade at the Prague Folklore Days in July with the rest of her costume, but it was too hot for it so the bodice was left off. (She works as a guide for foreign dance ensembles almost every year and wanted to finally join in in her own folk costume.)

Total cost: I got the wool as a super-discouted remnant with holes and smudges at work, so this amount came at c. 30 CZK! The lining fabric was bought ages ago but I'm guessing it would have been around 80 CZK per metre (it's very narrow). Can't remember exactly how much the notions were - let's say also c. 80 CZK for the interfacing, c. 30 CZK for ribbon, 100 CZK for buttons (bought from a seller online), about 30 CZK for negligible amounts of thread, most of the cost being the linen and the silk? About 180 CZK for dye + shipping (my sister bought that, so I'm not entirely sure, either). So a bit over 500 CZK all together? Because of my extreme employee discount, mocking up broadcloth still came out considerably cheaper than actual broadcloth, which starts somewhere around 500 CZK per metre...

* * *

Sooo. That pattern-drafting method.

I discovered Bilikis a couple months ago through a YouTube recommendation when I started watching more crafting / historical videos on YouTube. I really like her demonstrative explanations, although some of her methods are not up to scratch if you're used to modern Western sewing methods. (Others, though, on the other hand offer some simple insights especially for a historical seamstress that modern Western drafting methods overcomplicate, so it balances out.) First thing I noticed is - that folded almost-symmetrical drafting method may create problems for busty ladies.

So I divided all of my sister's vertical measurements into front and back, and drafted front and back separately.

(She decided to wear her corset underneath her costume, which isn't exactly accurate but makes her a lot more comfortable, as a very busty lady.)

I also, initially, took away width in the front both at the sides and at the centre, creating a sort of trapezoidal shape; after I made a mock-up and found out there was length missing at the front and a bit of width missing in the bust (I think I underestimated my ease in that area), conveniently missing exactly where I stopped my angled "dart" in the front centre so I could just add it along that line - I rotated the pattern piece to put the centre front on grain and added length both on top to widen it there, and on the bottom to account for the missing length that her bust ate up, i.e., I lengthened the front to the point where the new hemline formed a right angle with the front.

Like so:


(Plus button overlap.)

Which was completely intuited, but may actually be a pretty good method to deal with that front length shortage due to bust while keeping the same side length as the back? I'd have to think more on that. Generally, I think I'll have to give more thought to this drafting method as relates to various historical patterns - it's a really neat starting point.

Because I had two princess seams in the back, I think I used smaller measurements for my darts than Bilikis uses in her tutorial. I had to take them in a little during mock-up after all, and generally had to balance the back a little - taking width from the centre and adding it on the other side of the pattern piece only at the waist, which I think had more to do with my sister's specific build (she's pretty sway-back-y) than the drafting method as such - the exact sort of thing mock-ups are for.

I also had to cut into the armscye considerably in the front - mostly because it's a sleeveless bodice, I think. And to adjust the shoulder slope - my sister has very mid-19th century shoulders! (The picture above already features these two adjustments.)

Oh, and I moved the shoulder seam very slightly to the back - which you can see with my abundance of cellotape in the pattern above. Now I think about it, with my aim date, maybe I could have moved them even further? But it would have messed with the neckline and my aim for a pattern that's as simple as possible.


* * *

I made the buttonholes following the tips in the buttonhole tutorial(s) from Fort Ticonderoga, which proved priceless.

Aside from the fabulous tip to rotate the thread couter-clockwise, it was especially the tip on focusing more on keeping them even than at keeping them tightly packed that came really helpful. I just somehow completely forgot about the cording...


Here four of them finished, with some of the basting already taken out. I originally planned on doing six of them, but then decided only five looked more balanced.

Not bad at all for someone who's mostly managed to avoid buttons for fifteen years of sewing! Definitely all thanks to Stuart Lillie's tutorials. (Okay, and maybe also my general ability to handsew surprisingly neatly, and the power of handbasting stuff - a little more work that saves you a lot of trouble in the long run!)


* * *

This is a placeholder where I may share the finished pattern one day, to make life easier for other busty ladies out there.


P.S. I've introduced a new tag, "Mess of making", which will be strategically placed at posts of particular importance to the truth of occasional sewing fails, messy insides and shortcuts taken. What with sewists online recently often bringing up how discouraging it can be when everyone keeps showing only picture-perfect finished makes, and how helpful it is to see others make mistakes, too: here there be my mess of making, as promised in the very beginning of this blog. I'm not going to show you the mess that's my room, but I do promise you I won't, ever, stick to picture-perfect finished projects only. After all, my love of sewing is just as much if not even more for the learning process as it is for the ability to make pretty clothes. :-)