Friday, 4 December 2015

HSM #10: Sewing Secrets - My sister's corset

I still only have this one picture of the finished thing; including accidental tea stains than happened after finishing. But my sister's been wearing it and reports it's fine, except next time please scoop down the underarms a bit more.


Much earlier than this challenge, my sister asked me to make her a corset, to wear as a supportive undergarment. It was the first time I've ever made such a garment, so there was much work involved - starting, upon arriving home with the materials (all from Sartor - oh the joy of a dedicated historical sewing shop in my own country!), with figuring out how to set the grommets. Because they didn't come with an implement, and it turns out all such tools start around 500 CZK. So there was a lot of experimenting and gradually more and more successful try-outs all through summer; now I have a home-made udělátko that still isn't quite perfect, but works well enough.

I needed to start with that, because I decided I needed lacing strips for mock-ups. It held me up terribly, but I think in the long run, it was the right decision, because a) now I have lacing strips for mockups that I've already used again for another garment, b) it was also a mock-up for the setting of gromments, so I was a bit more confident on the final garment.

After that, it was to the mock-up. And the pattern. I originally contemplated making the corded corset from the Chisholm Trail Museum, the pattern for which Marna Davis shared through the Historical Sew Fortnightly Facebook group, and other freely available patterns like that; but in the end, I decided all the resizing involved was too much of an uncertain work for something I was doing for the first time ever, and used the drafting tutorial on Foundations Revealed.

I still had to make considerable alterations to it. In part, I think, because I miscalculated some of the measurements (I tried to follow The Dreamstress' guidelines for negative ease, but I mixed it up somewhere along trying to follow the tutorial as well). In part, my sister suspected, because she may have lost some weight between the drafting and the trying on. In part because we were not quite sure just how high and low she wanted it to go until we tried it on. And in part, I think, because I needed to take it in a bit under the bust for it to really give the support needed - larger cup sizes are accounted for in the directions, but maybe not quite enough? The underbust doesn't enter the calculations, which I think might be a mistake for larger cup sizes.


This photo is from when I played around with the final cutting layout, I think, so the pattern pieces are mixed up. But it seems to be after the alterations. In the end, I made all the pattern pieces twice, so that I could be sure about the layout.


(The mock-up was made from my father's old discarded jeans. He wears exclusively Levi Strauss, so he commented that it's a very expensive mock-up. It's okay; I think I'm going to reuse it for a mock-up for myself.)

After we settled on a shape, and on lacing in the front instead of the busk because my sister struggled with it, I cut it out of coutil and sewed it up. Press all seams. Then I added a waist stay out of twill tape, caught with stitching on all the seams.


Sunday, 4 October 2015

Deciphering Historical Clothes: Cca 1790 jacket from the Liberec museum

I bring you another instalment of Deciphering Historical Clothes, once again utilising the treasures to be found on esbirky.cz; namely this very lovely cca 1790 jacket from Severočeské muzeum v Liberci (Museum of Northern Bohemia in Liberec), inventory number T05316:


The description given goes: "Classicist ladies' jacket sewn by hand from a light blue silk fabric with a woven pattern of vertical stripes and brocaded stylised colourful bouquets. The jacket with a deep round neckline and large collar closes in the front with six hooks covered with a placket (I assume). The collar and bottom hem are trimmed with pleated ruffles. Long narrow sleeves close with one fabric covered button. The jacket is boned with baleen and lined in linen, the collar, peplum and placket are lined in waxed cloth."


It also says it's 50 cm long; I wonder if that includes the sleeves. It does seem to fit pretty much at the natural waist, with the points in the front and the back (and the peplum) running a bit lower. I cannot tell for sure from the pictures where the boning is, but I think it's at least at centre back.

There are several reasons why I chose to go with this jacket for my next instalment. One, I just love it (such gorgeous fabric! and such neat pattern placement). Two, there's both a back and front view and the very nice detailed description that gives us details we can't see in the pictures. Three, once again, the pattern allows me to see the grainlines. Four, I think I can provide you with starting points if you wanted to recreate it!
(Why yes, it's entered my long list of things to make one day if I find the right fabric; I think it is, so far, the most saccharine item to be awarded that distinction. Now I'm imagining a fluffy pink petticoat and wondering what's happened to me.)

Let's start with the colour-coding:


I went a bit overboard with the grainlines; mostly to help you visualise the curves in the pattern pieces. I believe, as marked in blue, that there are seams at the shoulders in the collar - or at least on the right shoulder: if you look closely, you'll see that the bouquets go in opposite directions and the stripes don't align perfectly in the front and in the back there. Having a seam at the shoulder would serve the purpose piecing often did: you would not have to lay a large oddly-shaped pattern piece on your fabric in one piece. I have not noticed any obvious piecing in the jacket and I think the number of pattern pieces as is definitely helps with that.
I am not sure if there are side seams under the arms or not: I can't wrap my mind around the grainlines/pattern there... It seems to me it doesn't align, going up into a chevron pattern rather than wrapping around - meaning a seam; but I am not sure.
There's a smudge in the centre front on the front piece; I am assuming that's where the left side of the jacket ends underneath, possibly strengthened with a bone. The right side flaps over.


As you can see at the shoulders, I'm not sure how the seamlines would continue under the collar and I am proposing two options.
The sleeves don't have a seam running down all the length in the back; I link below to a blog post with a sleve pattern I believe to be very similar to what's going on here. Note: The grainline in the top of the left sleeve is mistaken; it should run more vertically. There are sleeve openings, closing with a single covered button as noted in the description (marked red). The opening is likely there because the sleeves are very narrow. They appear to be about 3/4 - 7/8 length. ETA '24: Actually... not sure what past me was thinking, I'm fairly sure they're full-length, or almost.
It's nearly impossible to tell the grainlines in the pleated peplum, but I seem to see grainlines running on the bias to the pleats. It would probably allow the peplum to sit more smoothly around the curves of the jacket and body if that's the case. The jacket would have been worn with a bumpad or something like that underneath, which would likely make the pleats at the centre back stick out and look less crushed.

The ruffles appear to be strips of fabric with scallopped edges, pleated: a single pleated strip on the bottom hem; scallopped edges on the collar with a pleated strip like that sewn a bit further from the edge, most likely (on the bottom row of scallops, the stripes from the pattern continue from the body of the collar, if you look closely).

Now here's about the making: Katherine-Koshka has made a similar jacket, here. She says she's going to make a tutorial, but she has not published it yet. However, she has made a tutorial for the other jacket in that post, which includes a sleeve shape I believe to be very similar to the sleeve here. She has also made a redingote with a similarly lying collar, which she writes about here, including pictures of the collar pieces laid flat. The collar of the Liberec jacket would have a seam at the centre back at the least, would not have a notch and would taper towards the centre front more smoothly; but the method of construction would be similar. And she owns an antique 1790s jacket that's shaped differently at the waist, but probably features very similar construction methods: notice the overlap in the front, the use of different linings, the seaming in the sleeves. I wouldn't be surprised if the hooks and eyes in the Liberec jacket were a later addition and if it had originally also pinned shut.

I think you could Frankenstein it from any reasonably similar 18th century fitted bodice pattern. ETA '24: Since publishing this post there are now more patterns on offer! I never got around to finishing my Frankensteining experiments and currently I'm contemplating somehow mashing together the Scroop Patterns Amalia (for the right style of back pattern pieces) and the Black Snail Patterns 1780s Redingote (for a start on the neckline / collar).

Like Nehelenia Patterns' 1790s jacket or 1790s Redingote (or maybe other patterns as well), Sense & Sensibility's 1780s Ladies' Portrait Dress pattern (which would require raising the neckline in the back), or the bodice of this Danish Robe Piemontaise (where you'd have to separate the front from the side back pieces, but otherwise the basic lines seem very similar). Being the natural-born pattern Frankensteiner that I am, I am in the process of designing a 1790s-style jacket pattern from the 1848 jacket pattern: some slashing and re-taping in the back to change the number of pattern pieces, cut off material from the shoulders, ignore the darts and add material to the centre front, round out the neckline, and you've got something very similar to this. (Of course, I'm going to need a different sleeve pattern.) For the collar, you can follow the principles of Peter Pan collar drafting and just change the shape.

Sunday, 9 August 2015

Some old beauty for Sunday

Well. The snow helps; we've been having hot and dry weather for way longer than is natural.

But the main reason I'm sharing this song (this instrumental arrangement) is because it's an old, old favourite. We've had an LP of this Polish band all my life, we used to love it as children, I still love it, even in its faded scratched LP-into-computer state; and now this clearer version... yeah. It's perfect.

Monday, 3 August 2015

Heritage sneak peak

The original idea was a Moravian Wallachian folk costume shirt that could double as a Regency shirt and would involve this so far rather wonky embroidery...


... but seeing how long that's no doubt going to take and that I have other priorities than to spend the month of August embroidering, it got relegated to slow progress and the Silver Screen challenge (I do have a way to make it fit that, honestly).

The green stitches are me finally trying out the various stitches in the book on folk costume embroidery I bought years ago. The diagrams are rather confusing, but I think I've finally figured most of them out.
One of the things learned: Detached buttonhole stitch is called "stínek" in Czech; it's also the name for this, as it's used to connect two pieces of fabric. Based on that and a picture in the book, I'm assuming the name applies to the stitch because it was also used to connect two pieces of fabric.

* * *

What I turned to for this month is, instead, a Moravian Wallachian folk costume bodice.
Which will carry on to the later Sewing Secrets challenge with the addition of detachable sleeves to be turned into an approx. 1790s jacket/spencer (exact method of attachment to be determined). No, I don't think it's entirely accurate, but it's close enough and it works for me! If I'll be attending more of the Regency events, I'll need a spencer sooner or later, so why not kill two birds with one stone?


The pattern was derived from the kacabajka pattern, because I really do like killing two birds with one stone and using what I already have.

The fabric used to be a thrifted coat. It's only 80% wool, but how often would I find quite a lot of historically passable red wool fabric only for 50 CZK? I squeezed the whole of the body from the raglan sleeves. The new, curved sleeves will have to be cut from the body of the coat. Ah, the paradoxes of repurposing!

Monday, 27 July 2015

Latvian folk costumes in Prague

We interrupt our completely unscheduled usual talk of sewing and Czech landscape to bring you more Latvian folk costumes!
(It actually ties nicely into the upcoming HSM challenge of "Heirlooms & Heritage", except that the heritage isn't by any means mine...)

You see, there was a festival of amateur folklore ensembles in Prague last week, the Prague Folklore Days, and because my sister speaks Latvian, she was asked months ago to act as a guide and interpreter for Katlakalns, a Latvian ensemble from, you wouldn't guess this, Katlakalns*. :-)

So when they heard I was interested in folk costumes, the ladies gave me a quick fashion show after their performance and I have photos to share.


This first one is probably the most interesting in its "story" - it is the folk costume of Abrene, nowadays in Russia with a different name (which may still have Latvian roots).
Other than that, it's the style found in Latgale, the eastern part of Latvia, and allegedly (according to that Wikipedia article), in being all white it is the oldest type of Latvian folk costumes. I have a thing for Latgalian folk costumes, as my last post on my old Czech blog attests.
This one was apparently a little adjusted for the necessities of performance (there was a zipper at the side), but you can still see the typical features - the off-white colour, the red accents, the upturned bottom corners of the bodice, the red embroidered "crown" (worn by unmarried girls throughout Latvia), and the white shirt kept closed with a (more-or-less) circular brooch at the neckline, which is something all Latvian costumes seem to have in common.


These are from Ķekava, i.e. the region/municipality the ensemble comes from. Notice the richly patterned pleated skirt - they make for a lovely sight in movement. :-)
It's also a little bit more typical than the Latgalian one, as you'll see on the following photos. It seems to lie on the border between Zemgale and Vidzeme, so some of the sources I glanced into put it in the one and others in the other (presumably depending on whether you treat the Daugava as the border or not).


This one's from around Rīga; my sister pointed out the metal buttons to me as a feature marking it as a costume from a richer background.
(It's quite fascinating how subtle the differences can be, especially compared to Czech and Moravian folk costumes, where there could be silk brocades and tons of starched petticoats involved... It's another reason I enjoy the Baltic folk costumes - they never cross the line into impractical show-off material.)


Vidzeme (the northern part of Latvia). The pleated, striped skirts and simple bodices continue.


Krustpils. Apparently the border between Vidzeme and Latgale. A plaid twist on the pleated, striped skirts.


This is their fun-loving soloist, in a costume from Lielvārde. The town is, among other things, renowned for its richly patterned jostas (= the woven belts somewhat typical for Baltic folk costumes). Also, I've visited there, so I'm a little partial. :-)


This costume is from Rucava, a Curonian town relatively near the border with Lithuania. Me and my sister have agreed that it shows in the costume: the green colour is not so typical, the bodice is longer which is more typical for Lithuanian folk costumes than Latvian ones, just like the long ribbons are.
Also, notice the skirt is cartridge-pleated rather than box pleated: that's another distinction I noticed between costumes with patterned skirts and costumes with plain-coloured ones.


To contrast, a costume from Katlakalns itself: richly striped skirt, box-pleated.


Two costumes from Alsunga. Also Kurzeme / Courland. Cartridge-pleated skirts, decorative trim in the front of the bodice running below waist, metal (brass?) crowns.


Nīca. Kurzeme, typical "jewelled" crown and woven bright red skirt with an irregular pattern (cartridge-pleated).


Bārta. Kurzeme - the same crown, black cartridge-pleated skirt with a patterned bottom and a silver-trimmed red bodice.
(Apparently, normally the shirts of the above two, at the very least, would also be embroidered, which again seems to have been dropped for performance interchangeability.)


And one from Kuldīga, also Kurzeme. Similar to the ones from Alsunga; clearly, there are regional similarities and the costumes are not uniform even in one town or village.

I really liked that this ensemble went with that variety, especially because they happened to be the only Latvian ensemble present, and it went really nicely against the tendency of many other ensembles to be completely uniform in their costumes. Which may make sense from a performance point of view, or because obviously they have their costumes made on order, but it makes it rather limiting if you're looking at them as a representation of their country's culture at an international festival!
Not that I can really hold it against the others, because it was a festival of amateur ensembles, many of whom probably don't get to represent their country abroad that often.

* * *

Alas, I cannot show you videos of their performance, because my camera tends to switch itself off very quickly when I take videos. So I didn't try that, and there are no videos of their performance on YouTube (yet?).

I do have photos from their performance, not really representative because dance is difficult to photograph. I also have pictures of other ensembles. That's a topic for another post.


* Google has an annoying tendency to assume that the Latvian -s ending is a typo of -a, and forces all the genitive cases on me.

Saturday, 11 July 2015

Deciphering a 1900s corset

Some great news: Uměleckoprůmyslové muzem in Prague put all the photos of their public domain items on esbirky.cz in public domain. Which means you can download big pictures of things like Art Nouveau prints and jewellery. And clothes. Here. ETA 2018-07-31 Sadly now the Esbirky site itself prevents download so even the pictures from museums that originally made it possible are now barricaded up by web design.
Some worse news is, the digitalisation is apparently slow, because there's only a fraction of the clothes I know they could put up. None of their lovely Regency or 1840s clothes yet, no better picture of the 18th century silk corset or 1850s bodice. And the search engine on the esbirky interface is dubious, possibly faulty: when I search for "korzet", it gives me no results, even though I know there is at least one corset there.

This one:


c. 1905, Prague, height 37 cm, inventory number 104484.

Where the 1840s bodice's plain fabric allowed for deciphering, here it's the stripes. And the quality of the image. As I loked at it and tried to figure out the probable shape of the pattern pieces (it's a bit of an automatic mental process by now), I thought "I've seen a corset patent like this."

And indeed, I had. The helpful Haabet site lists them by various criteria such as number of seams at the waist, so it didn't take long to find the one I had in mind.


Mr Albert P. McGraw argues in his accompanying text that this principle of costructing the corset allows for a much faster and economical construction. And that while he provides this particular drawing, the patent applies to the principle rather than the particular shape. I wonder who stole the idea, the Czech manufacturer of the corset above, or Mr McGraw? Or is it just a coincidence?
ETA: Option four? I looked through my book on Czech fashion 1870-1914, published in conjunction with the UPM, just to see what else they have in their collections. And there it was - not this corset, but ads for the "Korset Radical", made by the corset factory Federer & Piesen in Prague, and advertised as using a patented pattern. Patented where, by whom, was there an affiliation? Mysteries!
It explains their dating of the corset, though - the first of those ads, showing a similar one, is from 1905.

Anyway, to complete the deciphering, here's another colour-coded picture, as far as I'm able to tell:


seams between pattern pieces
bones
busk 

I didn't bother with grainlines, for obvious reasons.

It looks like it's more or less the pattern pieces from the patent, with additional strips to cover the busk and for the lacing (as described in the patent's text); with a different boning layout of doubled bones: running over the bust, beside the bust and curving slightly closer to the front in the bottom, at the sides, and probably still more in the back. And additional, unboned pattern pieces in the front and at the hips, probably for garters and maybe also to smooth the hips somewhat, like in later, 1910s corsets. It actually looks like an interesting transitional piece to my eyes inexpert in this period - it retains the hourglass shape, but it's an underbust corset and has that hip action going on. But notice there's more room in the hips than the mannequin has... it's definitely aiming for a very curvy figure rather than the later slim styles. The curving of the boning layout suggests an S-bend.

The lace is, as far as I'm able to tell, simply folded over/gathered around the corners in the front to form that particular shape.

* * *

I hope these types of analyses could be helpful for someone. I really liked when American Duchess did the Costume Analytics, and it turns out I may have a better eye for this kind of thing than some other people, so it gets its own tag, "Deciphering historical clothes." I can't promise it will be a regular feature and I definitely won't promise I'll do what you ask me to do. But I think I would like to know if it really helps, or what may still be confusing, or what else you might need to know if you do have trouble deciphering clothes. :-)

Wednesday, 1 July 2015

HSM #7: Accessorise - A fichu en marmotte

Once upon a time, The Dreamstress posted a terminology post that postulated the existence and reasons behind a simple style of headscarf called fichu en marmotte in French.
Now, I was obviously thrilled by that. Not only does it relate to my nickname, it's even a style of headscarf I'd already adopted before that post.

Once upon a time, a little later, I found this fashion plate, and that solidified my love for fichus en marmotte, and also supplied me with a slightly different style of tying one (a bigger one). Which I've defaulted to so often, I became painfully aware of how one-note I was becoming.

So it's been in the plans for a while, making new fichu-en-marmotte-able scarves, and the first scarf itself had been in the works for quite a while, too, but I only finally managed to finish it now. Just in time for the Accessorise challenge!
(It was originally meant to go into the Terminology challenge last year. Well, as long as it got finished!)


What the item is: A fichu en marmotte
The Challenge: #7 Accessorise
Fabric: white & green printed cotton - originally a thrifted pillowcase
Pattern: none - it's a cca 80 x 80 cm almost-square
Year: 1790s, inspired by a 1797 fashion plate
Notions: white cotton thread, ooooollld "wine red" & "light brown" dyes (turns out in the parlance of the day, "light brown" was more like something I would call simply "brown", so it turned out browner than I planned - that's what the picture with the Latvian flag is there to demonstrate)
How historically accurate is it? I don't know, maybe 75%? It's just a hand-hemmed piece of fabric. The original green of the print was way too saturated, which is why I overdyed it. The dye itself is definitely not accurate, but overdyeing something would be, and the colour could be achieved with period dyes. :-)
Hours to complete: I worked on it on and off for months between other projects, but the hemming could not have really taken more than cca 4 hours altogether. The dyeing was cca 2 hours, plus about 9 hours in a vinegar solution to set the dye better.
First worn: Today
Total cost: I forgot - it's been a while since I bought that pillowcase. Thread was vintage and a gift. Dye was almost vintage, too. Refer to fabric size and local dye prices for an approximate idea...


In case you were wondering why I overdyed it - here's what the original pillowcase looked like:


Kind of; I've only got this high-contrast photo that may distort the colour. It's not a bad colour, but next to my face, it was too harsh.

* * *

Oh, and in case you were wondering who it is I'm holding? One of our cats has kittens. Three. All black.

Friday, 19 June 2015

A walk near Medlánky

Hello. *waves uncertainly*
I haven't posted here in months, which had a lot to do with the prevailing lack of sewing in those months.
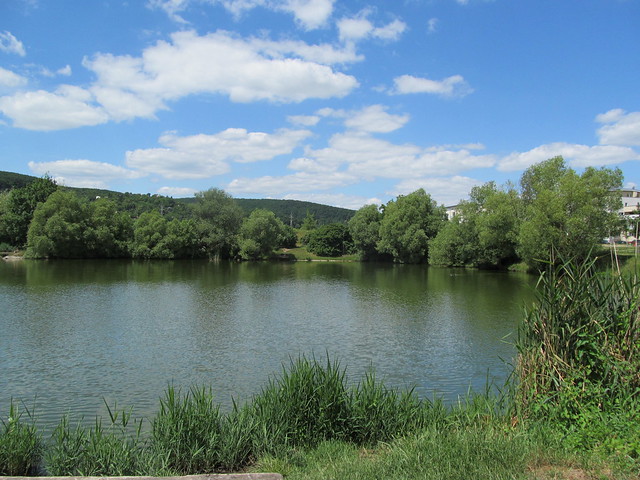
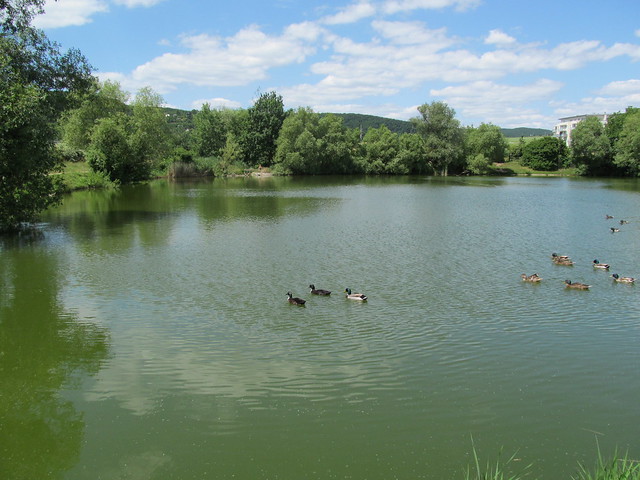
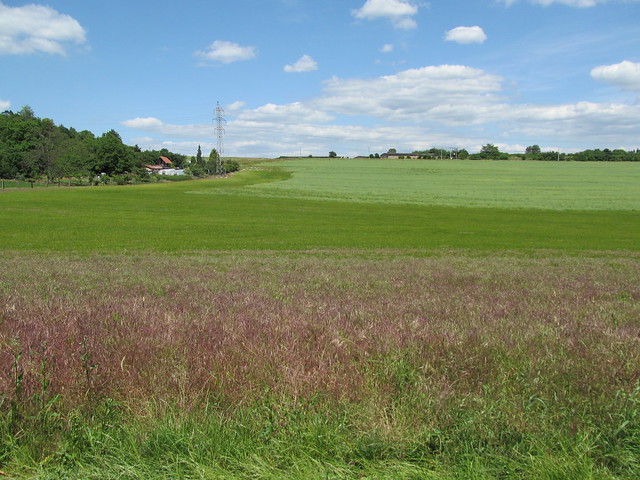
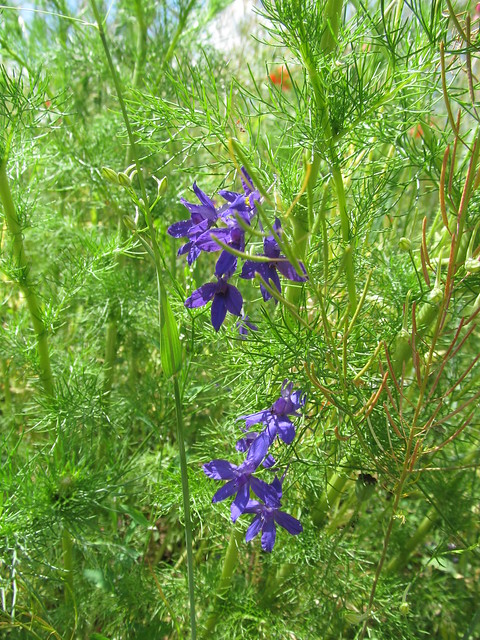
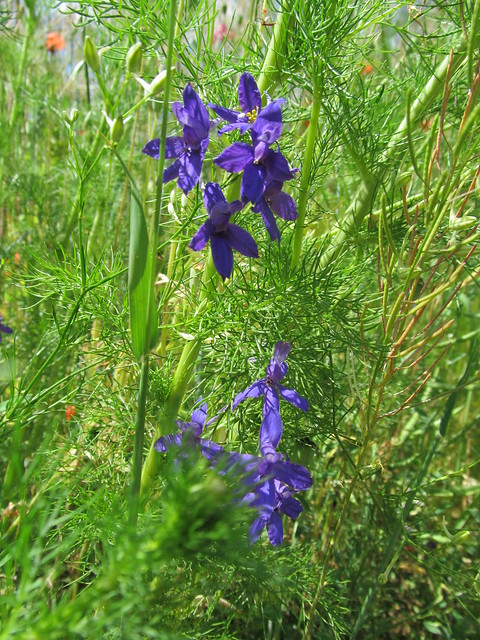
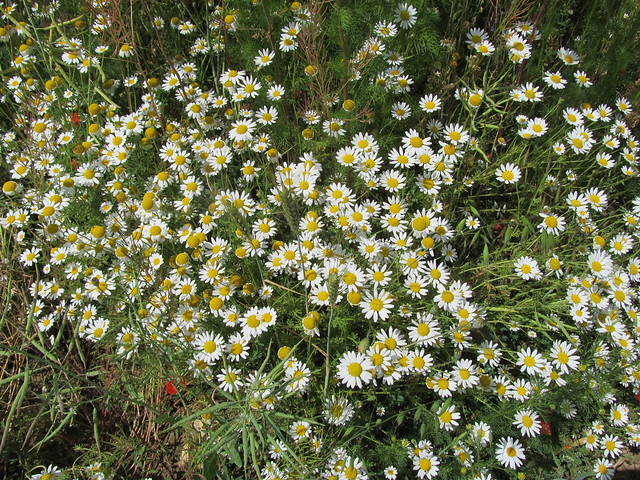
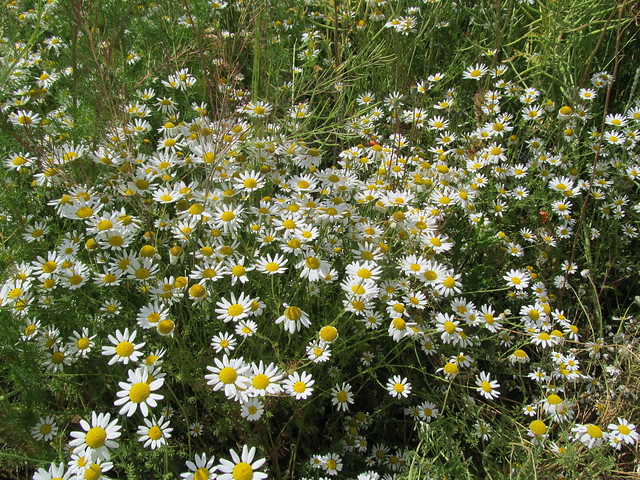
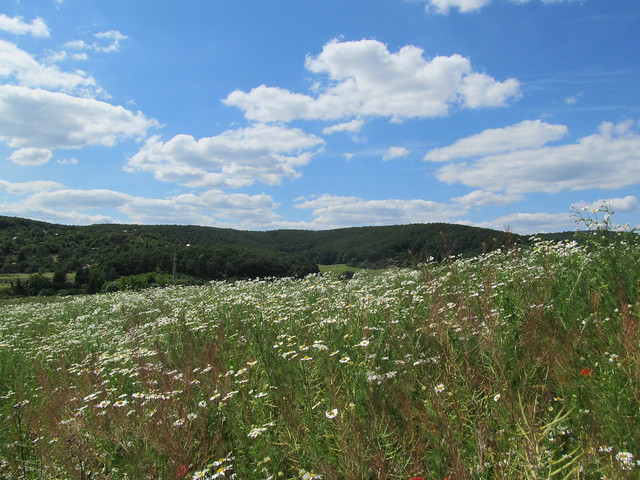
There still aren't photos of sewn things to show, but there are fabulous photos of the natural world to show, from a walk I took this week with a friend at the edge of Medlánky, Brno. So, just a little proof that I'm alive, God is good and some sewing things may show up later. :-) There are plans of sewing a corset for my sister. Materials bought. Pattern to be figured out. Fear to be overcome.


IMG_4418

IMG_4419

IMG_4420


IMG_4422

IMG_4423

IMG_4424

IMG_4425


IMG_4427

IMG_4428

IMG_4429

IMG_4430

Sunday, 25 January 2015

Deciphering an 1840s bodice

Extant clothes are important. They're important for costumers, to see how things went together; but they're also important simply as a document of how people used to live.
Although, being into sewing, I'm particularly interested in how things went together.

Pinterest, on the other hand, is, just as we say about fire in a Czech saying, "a good servant but a bad master". You can find great stuff there, but you always have to be the master and check it out, otherwise you can end up perpetuating a mistake. Where I'm getting with this is, thanks to Pinterest and thanks to at least sometimes actually checking the links, I've found more blogs and museum sites I was unaware of. Some of the best things, it turns out, can be found on Dutch museum sites - like the Regency half robe I posted earlier on this blog.

Or like this super-simple 1840s dress bodice that makes it possible to infer how a basic 1840s bodice goes together, at least in the front (sadly, no back-view).


(It's in the Amsterdam museum, inventory number KA 13119.)

So let's see what I can see:

  • where there are basic seams
  • where there are piped seams and piped hems
  • where the grainlines go
  • and where there are hemming stitches (I forgot to mark the bottom - it's less obvious)


It's particularly interesting to see the piping in the front darts. Sometimes, there would be a separate front pattern piece. This one has just darts, though, and seeing the grainlines, they're probably quite narrow, too. And still piped. This might suggest the piping works sort of as cording, to help the seam lie smoothly?

The description (sadly, the website is built in such a way that I can't link directly to the object, boooo!) says there are three bones / pieces of baleen in the front (presumably at the centre seam and the darts?). Then it says something about "zijbalein" on "both sides", which sadly Google translate does not help me decipher - does it refer to the bones in the darts, to the side seams, or something else? There's a drawstring in the neckline (!) that ties in the back. There's a back closure of eleven hooks and eyes, hidden by a band (placket?). There's evidence of an attached skirt, not in the collection.

And it says this simple style of white dress would be an afternoon dress for a young girl.

What makes this such a fantastic find is the complete lack of any frills. It's almost like a muslin to build on; yet, since it has piping, it's obviously an actual garment.

ETA 28/06/2019: I wonder if it may have been a bodiced petticoat, like this one in the John Bright collection? Still, the piping and boning seems to me like maybe too much trouble to go to for underwear.

I can see the grainlines (at least in the front and the sleeves); thanks to that, I can deduce that the straight of grain lies along the neckline and the front seam is partially bias (= not true bias) and probably shaped. The shoulder seams also lie on bias, while the sleeves seem to be a very simple, straight-cut, almost rectangular shape.

The best part? I didn't even have to wreck my head too much to figure all this out. Making that colour-coded version of the picture above took maybe two minutes, and now I have a much better idea of how a basic 1840s bodice works.

Saturday, 24 January 2015

HSF #23: Modern History & HSF #24: All That Glitters - Jewellery bits and pieces

I'm putting this up in the wrong order, but that's because some of it is waiting to be re-made, so...

For the last challenges of last year, I decided to add to my historically-usable jewellery collection. One of the things I really wanted was the key brooch from this plate.

So that's exactly what I made. It was as simple as buying the requisite components and gluing them together. (Well, and then changing the colour, but more on that later.) So I put that under "Modern History", because it didn't involve much changing of the modern components, so it's obviously something you could do just by walking into the shop and picking what you'd like, without the historical inspiration.


Now, about the colour... The components available in that shop are mostly silver, with only some brass and gold. I suppose gold isn't fashionable right now or something. It's a bit of a problem for me, because most Regency-ish jewellery involves gold rather than silver. I resigned myself to a silver key, but then Leimomi mentioned her experience with colouring metal buttons on my Facebook post. I looked up the marker she had used, saw it was "acrylic" and realised I had golden acrylic paint. So I went ahead and tried it and the results were quite good. Except that it rubs off with force (like when it fell into the radiator, eek) and washes off. So now I have a half-gold brooch and have to decide if I'll resign myself to a silver one again, or try and figure out some other way to colour it gold...


What the item is: A key brooch
The Challenge: # 23 Modern History
Fabric: none
Pattern: none, but the idea came from the aforementioned fashion plate
Year: 1797
Notions: key-shaped jewellery component, jewellery pin, super glue, golden acrylic paint (or maybe not)
How historically accurate is it? The key-shaped brooch is documented, but this one is probably some non-historic kind of metal and got painted with acrylic paint. Plus superglue.
Hours to complete: Minutes till the glue dried... plus much longer with the paint - quick to paint, long to dry.
First worn: In the silver stage, sometime in later December, modernly into a restaurant, holding together a low neckline slit on a blouse, exactly as it's done historically on that plate.
Total cost: If I remember correctly, 25 CZK for the key and 5 CZK for the pin = 30 CZK = cca 1,35 USD. Plus superglue and acrylic paint, but either amount used is just a fraction of the whole package.

* * *

For the following challenge, All That Glitters, I followed in the jewellery components vein and made two hat pins / something that could be used to hold Regency headpieces in place, etc.

The first is another very simple superglued piece. Remember how I've found some "beads" without holes when I went through my bead stash? I've found the perfect use for them.


It's as simple as can be, but I'm sure I could make it more fun and add those decorative metal bead "caps" in further iterations of the theme.
(Because the bead is round and the base is flat, and the superglue still takes some time to dry - at least the one I have -, I had to try gluing it twice. Just a word of warning.)

The other pin is more elaborate, and I plan to write a tutorial of sorts on it in a following post, because it's a fairly simple technique that could be applied to other kinds of decorations (I have a feather piece in mind.)

 
The golden-ish sheer ribbon was a small piece I found once in the remnants bin and bought just because I liked it. The button was an orphan in the stash. This is the best kind of project, using something like that in a lovely and meaningful way!


What the item is: Two hatpins
The Challenge: All That Glitters
Fabric: none
Pattern: none, but I took inspiration from American Duchess' cockade tutorial for the second one
Year: 1800s-ish, but it could be used for a range of eras
Notions: two kinds of hairpin components, small glass ball, superglue, two kinds of polyester ribbon, thread, metal shank button, and felt for the base
How historically accurate is it? Superglue. Polyester. Modern jewellery components. But it's simple and small, so not so jarring; and the second one is handsewn. Using The Dreamstress' criterium of "would a historical person recognise it for what it is?", I think it passes.
Hours to complete: Minutes till the glue dried for the first one, maybe an hour or so for the second one (I made it in two sittings, so I don't remember anymore).
First worn: not yet
Total cost: I forgot. And I bought the components together with others and the bill never tells which price was for what, so I can't look it up. But it can't have been much, all in all. The ribbons, button and felt were from stash; otherwise, they would probably be the pricier part of it.

Friday, 23 January 2015

HSM #1 - Foundations: A batiste slip or chemise

My main project for this challenge was a simple slip. Now, the reason I decided to make a simple slip is because simple = versatile.

I'd wanted to make a slip out of the batiste lingering in the stash for years now. So when I realised a simple 1920s design of rectangles and triangular gores at the sides (inspired by American Duchess' tutorial, but not the same) would be a reasonable approximation for other eras as well, I decided to go for it. It's so simple and unobtrusive that I can wear it under modern dresses as well: that was the very first idea for the fabric. The slips I got from my mum years ago don't fit me anymore.


The final impulse came from the fact that this year's annual ball held by my church was 1920s themed. In the end, I did not attend, in part because I still don't have a dress to wear over the slip and in part because I want to go to a Regency ball in February and somehow the whole Regency thing takes precedence.

But it gave me the final kick of "Hey, Foundations challenge, and I want to bust the stash, I could make this thing I've pondered for years!"


It's also an approximation for medieval times, namely inspired by the chemises worn in various Czech illuminations, e.g. here. It's not in any way super accurate (and definitely does not look like this), but it's not meant to be - what medieval I do have is more of an approximation overall, anyway.

And the other approximation is this: for the Heritage challenge this year, I would like to look to the folk costume of Moravian Wallachia.


An 1837 lithograph of the folk costume from Hošťálková, near Vsetín, Moravian Wallachia. Scanned from Langhammerová, Jiřina. Lidové kroje České republiky. Nakladatelství Lidové noviny, Prague, 2003.

I'm not going to make the full thing, I think, especially because I actually have nowhere to wear the folk costume of a region my family does not live in anymore. But I've always loved this particular style of folk costume and my family actually does, on one side, hail from Moravian Wallachia. And I do have ideas for uses for some parts of it.

Searching for what goes where in the costume, I came across the existence of a slip that goes under these folk costumes, at least in most places in Moravia if not everywhere. It's called "rubáč" in Moravia (and Slovakia, I think). Often, it has a gathered skirt - the only one I've found probably from the Wallachia region does, and so does this geographically unspecified 1940s piece in the Met Museum.


But then maybe that first one is not necessarily a slip that went under a folk costume - it looks quite modern to me in comparison to the traditional style of the Met one. And the Met costume is not a Wallachian costume.

What the dancers in this video seem to wear does probably not involve triangular gores, but it's definitely less full:


Besides, as I said, I don't aim to make a full, super-accurate folk costume, so as an approximation for versatile use, it works.

It's flat-felled, which is the only place where I'm not quite sure I nailed it: I still struggle with figuring out how flat-felled and French seams work where seams meet.


There are pintucks at the bust, which is perfectly fine for 1920s and probably less so for the other uses. (Oh, and those were actually my first pintucks. I'm not sure why I was so scared of them. Making just a few like here is super simple.)

And there's fine machine-made bobbin lace at the bottom hem.


Originally, I wanted to use another piece of lace from my stash (both laces given to me by my grandma or my aunt.) I did not have enough of it and in the end, I'm very glad that was the case, because the fabric is finer than I thought and the finer lace goes much better with it.

I did not hem it: I just used the selvedge.


Just the facts, ma'am:

The Challenge: #1 Foundations
Fabric: less than 1.5 of cotton batiste (or something of that type)
Pattern: my own: two rectangles (scooped down a little in the front after the pintucks were sewn down), four triangular gores at the sides
Year: 1920s, with leeways for elsewhen
Notions: white cotton thread, white cotton machine-made bobbin lace
How historically accurate is it? Cca 95% for 1920s (fiddly flat-felled seams are a bit winged). With the machine-sewing, pintucks, lace, fiber content etc., less so for medieval times and folk costume.
Hours to complete: I can never ever remember, even when I try to keep track. There were some mistakes along the way. Without them, it's quite quick to whip up. Maybe 2 hours? You still have to pin and sew the lace very carefully.
First worn: Just trying it out.
Total cost: It was all stash, given to me, so for me, zero. It would very much depend on the fabric used and your size.


P.S. If you go for it and decide to make yourself a simple slip like this, with gores, don't forget to start the gores at the waist, so that you already have enough fullness at the hips! Just thought I'd point that out. :-)