
Once upon a time, I fell in love with the 1802 portrait of Heinrike Dannecker by Gottlieb Schick, and decided I wanted to make an outfit inspired by it - really possibly my favourite portrait from the era, fashions-wise, as I've already mentioned.

Then later I came across two other portraits involving sleeveless bodices that I took inspiration from: this ca. 1795 miniature by Augustin Dubourg and the 1800 portrait of the Comtesse de Bonneval by Anne-Louis Girodet de Roussy-Trioson which was good for figuring out how the front would sit at a slightly later date than 1795. :-) (Links to Pinterest because the original links are broken.) - Yes, they're both blue worn over white dresses. My colour bias is showing.
I had some fabulously shiny cotton satin upholstery fabric that I had snatched up from a remnant bin and that seemed to want to become this sleeveless bodice. Red! Shiny for evening wear! So wonderful.
I played with the pattern for my transitional "bra" to turn it into a front-lacing bodice, and as I placed it on the fabric, I thought "maybe I could squeeze two things out of this fabric" and pieced the front to accommodate a more tetris-style pattern placement.
I ended up shifting the grainlines in the three front-and-shoulder pattern pieces in comparison to the "bra". Since it was my own experimental pattern it wasn't exactly set in stone anyway but:
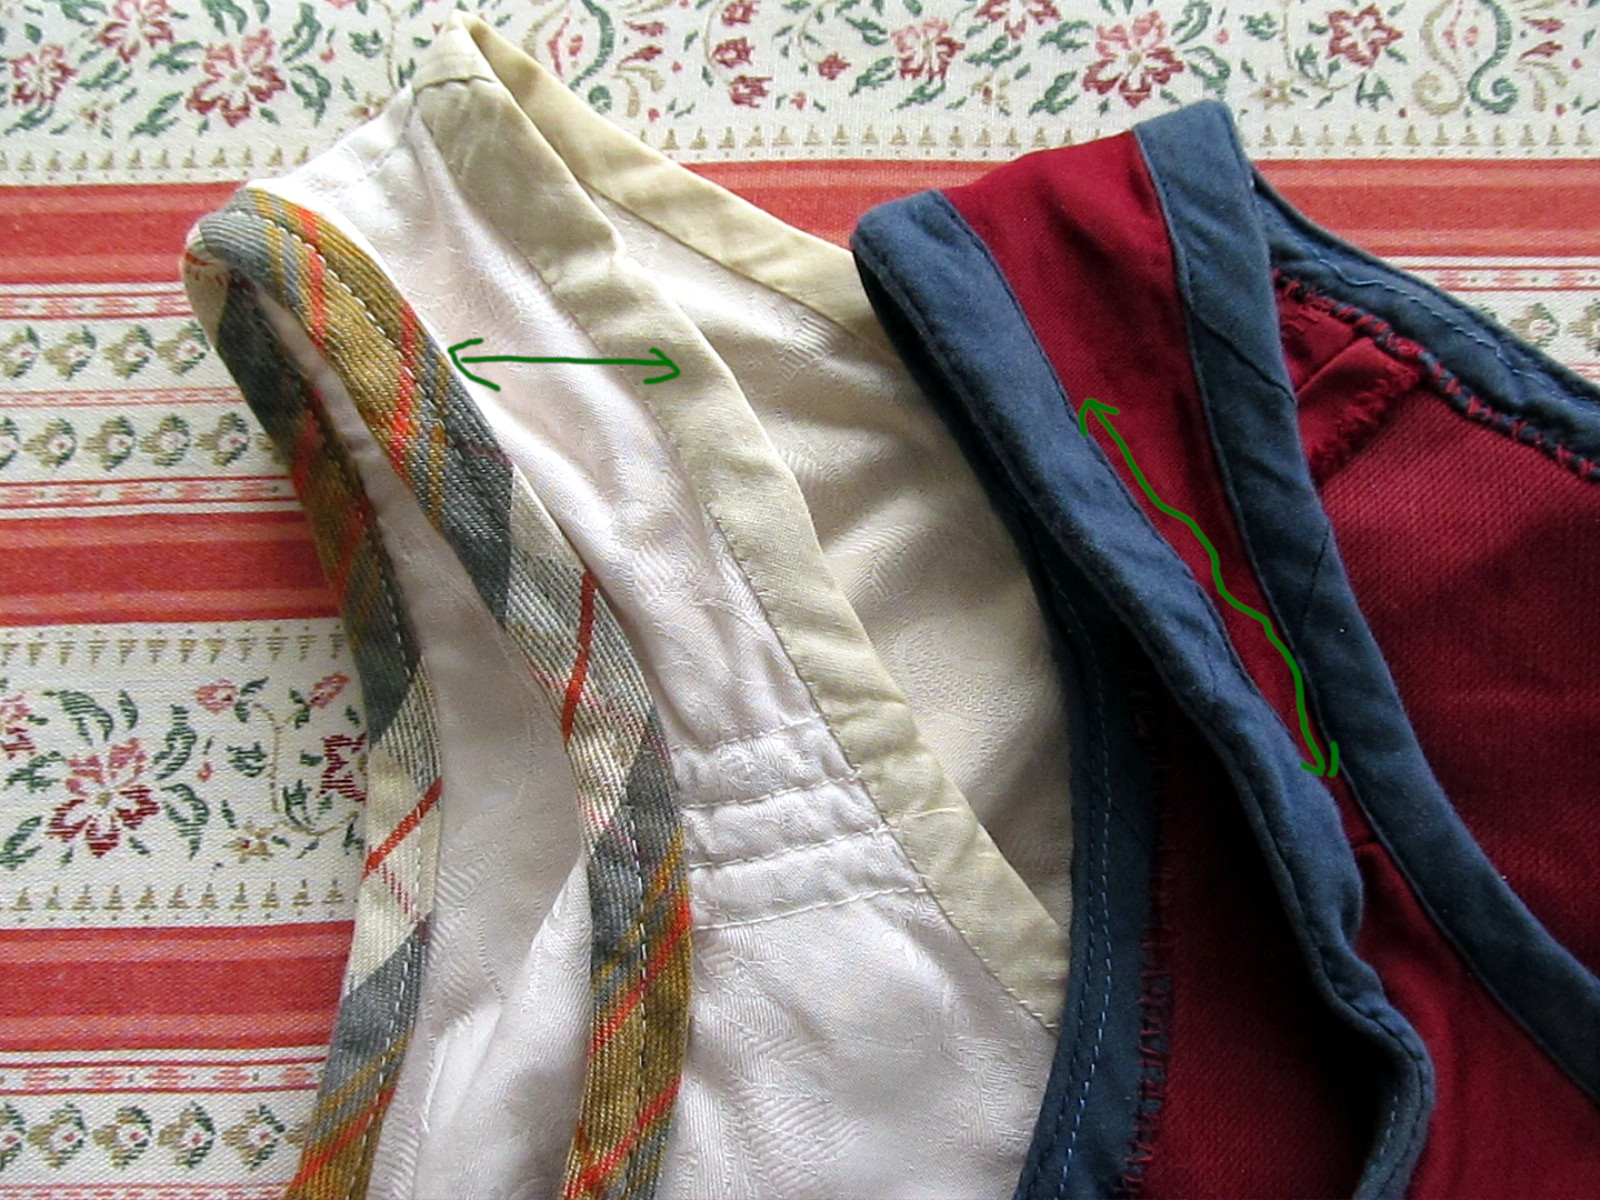
I find that shifting grainlines when altering and piecing historical patterns is actually mostly OK - as long as you keep your grainlines mostly the same / symmetrical on both sides of the body, don't remove bias from where it serves a purpose, or don't put bias somewhere you really don't want to stretch out! (Which was actually why I shifted it on the shoulder strap pattern piece: I wanted it lying nicely along the grain. That oddly shaped front bit got its grainlines shifted just for the sake of placement on fabric, though.) When loking at the patterns in the priceless German disertation on the Kostümsammlung Hübsch by Johannes Pietsch, I realised this was done historically, too, with pieced garments. So in that context, you can totally shift grainlines away to your heart's content!
I sewed the bulk of the seams by machine because I was excited and wanted to finish this bodice faster than my previous historical makes (four years is a rather excessive precedent and is stretching one's patience, once the undergarments are already done). Then I got the bright idea to fell stitch / whipstitch (?) the seam allowances down, which turned out to be not very brilliant actually because it resulted in ridges on the outside (thick upholstery fabric). But I kept it that way while I was ahead...
The lacing eyelets were rather a pain. The thick upholstery fabric was so hard to make proper awl holes in! And deciding to use buttonhole silk twist didn't help - it's bulkier. Though also neater, even if mine turned out to be lighter in colour than the fabric.

Thankfully, I decided to lace it with a cord I knitted myself out of cotton crochet yarn, with two stitches only (just like lucet, without a lucet), which is thin enough to pass through the resulting tiny eyelets (a large blunt needle in place of a bodkin helps, though, although it also passes through with more difficulty).

I spaced the eyelets as suitable for spiral lacing - although looking at Comtesse de Bonneval, I clearly could have gone with a regular criss-cross placement; I somehow forgot that part. (I need to work on keeping my inspiration images and sources before me throughout the process of working on things because that sort of thing happens to me far too often.)

I made a thread bar on the inside at the top edge, also from my buttonhole silk, to tie one end of the lace to. The bottom end of the lace I originally usually led back up underneath and tied to the thread bar again as well. When I had a not-lacing-tight kind of day (like when I wore this over a modern bra to church...), I just tied that end off at the bottom. Then that became the norm because my bust had grown about 6 cm since I first made the bodice... and now I've lost some cms there again, though not the full 6. But that's the flexibility of lacing for you! :-)
Originally,
I only finished all the edges with piping. I don't even think it’s
historically correct for the period anymore (maybe it's only an 1810s-onward thing?); and in either case, the folly of using an ahistorical
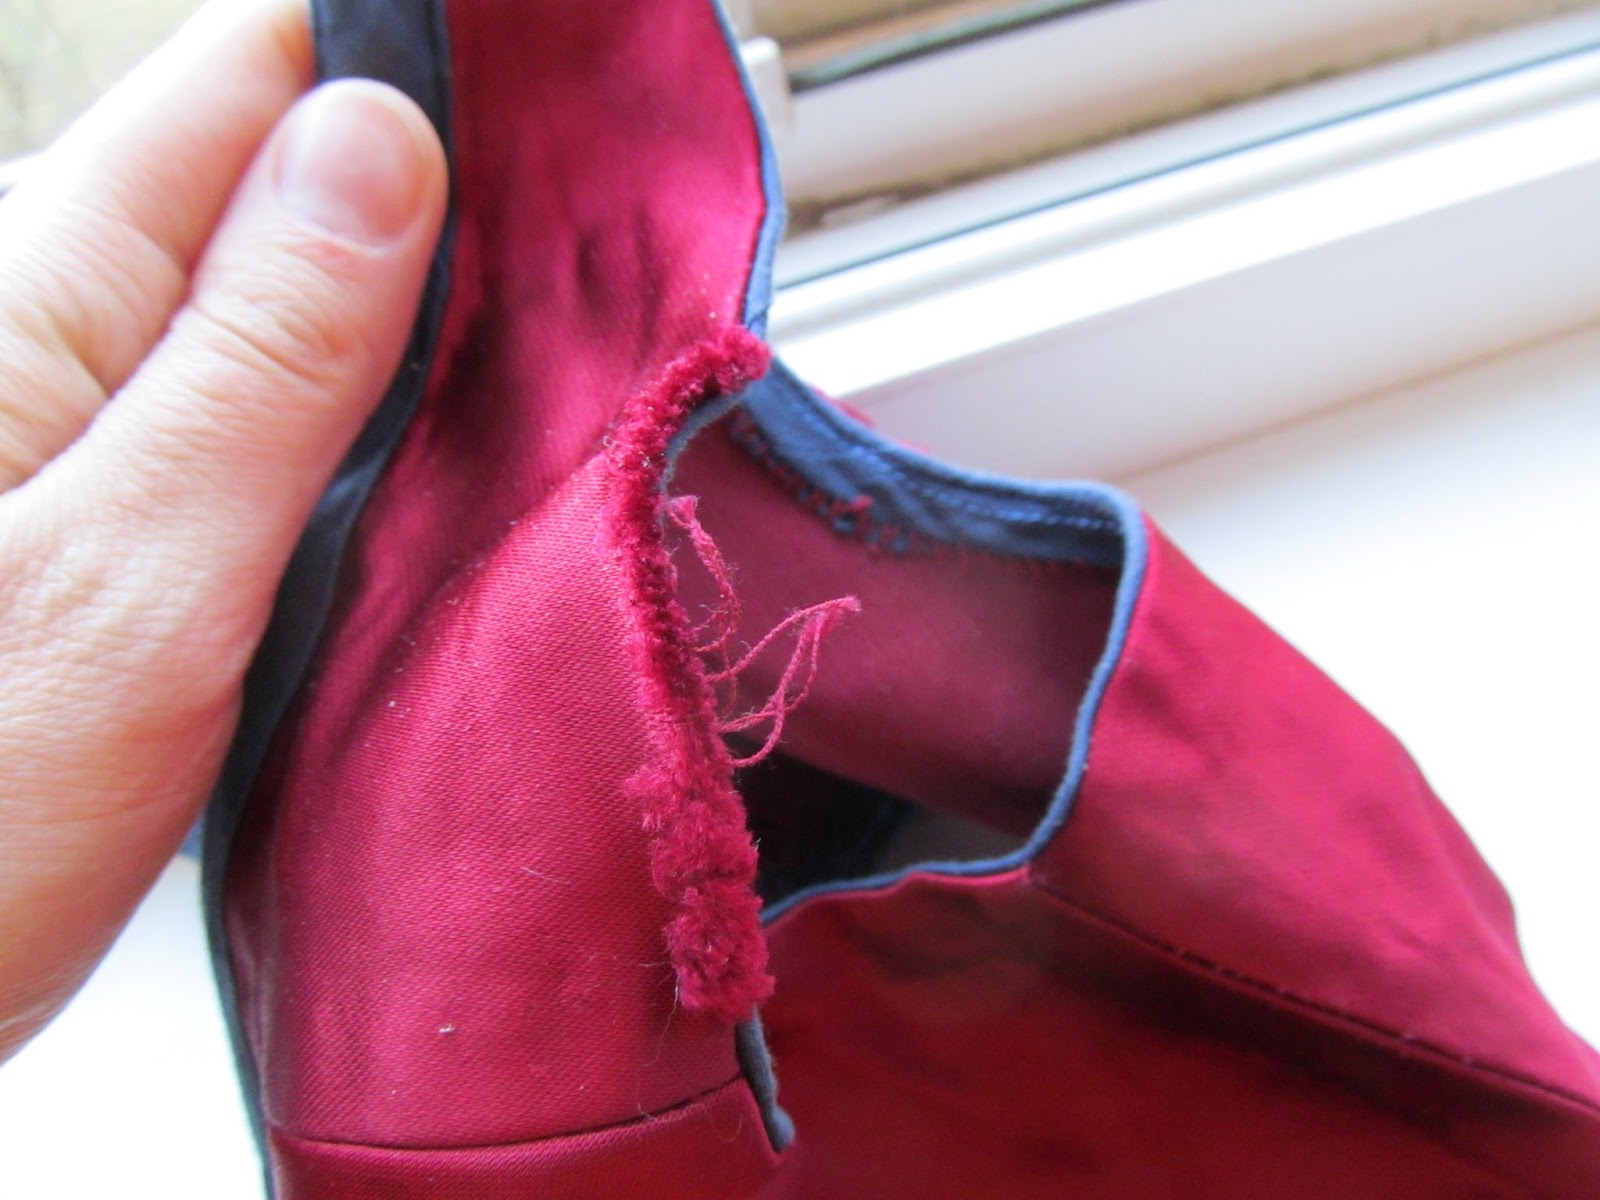
thick upholstery fabric this way became apparent soon: the fabric
ripped / unravelled in several places at the edges in the first wash, before I even had pictures taken. (All the photos in this post were taken during the restorative process or afterwards, I have zero pictures of it in the only-piping state...)
ETA: The problem is that, in order to turn the seam allowances around the curves, I had to cut them quite narrow and - well, the thick fabric is simply not suited to that sort of treatment, together with the thick turn of cloth it puts too much strain on it, and the fact it's a satin (= a somewhat looser weave) did not help...
I
was grumpy about it for a bit, because it ruined the clean look I was
going for, but then I caved in and added more trim to save it / cover it
up: bias strips whip-stitched (fell-stitched?) to the piping & stitched down with backstitch on the other side, and bias binding at the lacing holes in the front.
So that's the whole of the lesson of not using historically accurate fabric and historically accurate techniques. :P
(More historically accurate fabrics would also likely result in the historically accurate wrinkles one can see in the portraits...)
ETA: Notice that the bottom edge, which isn't so curvy, survived my piping treatment unscathed, presumably because I did not cut the seam allowance as closely as I did around the curves and the lacing holes at the front openening.

Anyway. Despite the problems, I'm happy with it. I'm particularly happy with the basic shape of the pattern, because that
looks exactly the way I wanted it to look. It looks so good I could not believe it when I first saw myself in the mirror and later photos... It sits just like the
bodices from the portraits. It's a very satisfying experience to get
that result without the jumping board of a pattern taken from an extant
garment, with something you just kind of eyeballed.

So I'm totally going to one day make another one in similarly rather
inaccurate cotton velvet, with hopefully more accurate construction techniques. I was originally thinking of a blue velvet remnant, but now there's the Purple HSM challenge and I thought back to the purple velvet... and there's Vanessa's oh-so-pretty printed cotton one... aaand I have some thrifted silk garments intended for repurposing as accessories... so, considering how easy it is to make this garment out of remnants, I suspect I'll eventually end up with a wide choice of sleeveless spencers to spice up my Regency ensembles. :D
I also want to eventually share the pattern (because it turned out so well!), but
this post has been in limbo long enough and I don't want to keep waiting till I finish digitising the pattern... especially because it occurred to me that with how simple it is, it may be a good training ground for improving my grading skills...
Just the facts, ma'am:
What the item is: “Regency” bodice / sleeveless spencer
The Challenge, and how this item fulfils it: HSM '17 #2: Re-Make, Re-Use, Re-Fashion. I used trim to save / cover up fabric damage.
Fabric/Materials: Marked down remnant of red cotton upholstery-weight
satin (NOT recommended, with emphasis!); navy blue lightweight cotton
sateen for trim (pretty great!)
Pattern: My own, an evolution of my wrap stays / brassiere.
Year: c. 1800
Notions: red thread (polyester, I believe), dark blue cotton thread;
red buttonhole twist for the lacing eyelets & a thread bar on the
inside which I tie the lacing to; dark blue cotton crochet yarn knitted
into a lacing cord; thin linen cord for the piping.
How
historically accurate is it? Meh. Fabric is wrong, some of the methods
are wrong (it’s even partially machine-sewn). On the other hand, the
shape is pretty spot on on me, so that’s a plus. Also, the Re-Make part
is pretty good: using trim to cover up damage is a valid thing, bias
strips as trim are valid as far as I know, and the handsewing stitches I
used (backstitch &
Hours to complete: No idea whatsoever. Sewing down the trim at one armhole (cca 52 cm) took about 1,5 h, I think?
First worn: In the original state, for the first and the last time to a
production of King’s Speech by the National Theatre in Brno (an
occasion that seemed to call for an evening dress, so I used the best I
had :D).
In this new iteration, to the “All in the Garden Green” ball held by
Jane Austen CZ on February 25 2017 in Brno-Tuřany. And then many times
afterwards, not all of them historical occasions, either.
Total cost: Low. I don’t remember how much any of the materials cost
anymore, but in any case, the red fabric was marked down and I only used
about half of it, the blue was cheap to begin with and I only used a
bit of it, and there wasn’t much thread or yarn used, either. All in
all, I’m guessing about 70 CZK ( = less than 3 USD)? The cost would go
up if I did it more correctly and used a thinner, historically accurate fashion fabric
coupled up with a linen/cotton lining.
Good work, Hana!! I remember that first photo from way back; I always loved that blue fabric and the whole color scheme. I imagine it would indeed be handy to have several of these to accessorize, as you say. But that's really a shame it frayed like that. If you stitched all around the edges of the cut piece, would that be helpful? (of course, you probably thought of this already)
ReplyDeleteThank you! Yes, it's a great colour scheme, isn't it? I haven't really updated my Regency wardrobe in years, in part because I love this outfit so much. :D
DeleteI don't think it would have helped, much - the main problem was that this thick fabric wasn't really suited to turning down the seam allowances around curves the way I did it with the piping. That meant I had to cut my SAs down pretty narrow to even be able to turn them, and with the thick turn-of-cloth it resulted in too much strain around the curves. Best course of action would be to (bias-)bind the edges instead - by catching the edges between two layers of thinner, more flexible bias (the piping on one side and the trim on the other), I sort of duplicated that effect; and it's how the multi-layer edges of corsets are usually finished, too.
I'll update the blog post to make that even clearer, because documentation of that sort is a big part of the point of blog posts in these Instagram and YouTube times! :-)
DeleteOh, yes! ;-) One can't look at a recipe without having to go through a dozen photographs, at least. :D
DeleteAh yes. I remembered my comment about navel-gazing regarding taking lots of photographs of toast. :D But when it comes to sewing, I think, and have heard from others, that blog posts really are nice for documenting how it went, what worked, what didn't, in a manner that you can easily return to to find that info. It's not something Instagram does at all I assume, abd something that's often far more difficult to zoom in on in a long YouTube making-of video...
DeleteI love these kinds of projects that have a lot of potential to mix and match! You're correct in the comment above that Instagram and Youtube are terrible for documenting things you've made in any fashion useful to others. They may be the "in" thing right now, but I still go back to people's well-written blog posts from years ago for pictures of detail or tricky techniques.
ReplyDeleteSo do I, and I also keep directing poor confused beginners of the Instagram and YouTube age towards blogs that cover all the necessary Regency info... I feel so sorry for them starting in this hobby now - the very same thing that makes it popular also makes it so hard.
DeleteI decided some time ago to treat my historical wardrobe as a collection of separates, exactly the way my modern wardrobe functions. It takes sooo much pressure off the whole creative process for me when I don't have to think of my costumes in terms of head to toe outfits. I managed to make a pretty good recreation of my favourite portrait one thing at a time and didn't even realise I was pretty much there until we took photos and I wrote the first blog post with both the photos and the painting. :D
Whoops, your comment was kind of lost in the continuing madness of this year!
DeleteBut yes, exactly. I also keep returning to blog posts, and linking to blog posts, and not just for project but sometimes also explanation of terms - e.g. I regularly find myself linking to well-researched and well-written articles by The Dreamstress from, to my surprise, something like eight years ago (I still remember them like yesterday), in response to poor lost sewists and costumers of this age who think the info does not exist because they could not find it on YouTube. :D
I keep repeating over and over that I prefer to treat my historical wardrobe like a wardrobe of separates. It's also incredibly helpful if you're like me and just can't keep up the steam for a project - a lot easier to finish things when they're separates. And thus I managed to recreate my favourite portrait look almost head to toe (sans shoes) almost by accident, from a series of separates. :-)
So I just found out Blogger tossed MY OWN comment into spam. So now there's two similar comments...
Delete