Showing posts with label Accessories. Show all posts

Saturday, 28 February 2026

Some more knitting for children (HSM '25 Pink, and a baby hat)

 I don't really do new year resolutions, but I do happen to have several for this year. To wit:

1) Finish more projects than in previous years.

2) Use more of my already extensive collection of sewing and knitting patterns / books.

3) Post more of my projects on this blog.

I'm happy to report that one of the two makes I want to share in this post now checks all three boxes! Well, not quite the "more projects than in previous years," yet; but I'm coming close to finishing with more projects, so I expect by next week I'll have surpassed 2025, and that's a good start on that one.

But first, the pink singlet / vest for my little niece which was my one lonely HSM entry for 2025:


I've decided that from here on out, my niece shall be referred to on this blog as Kitty. Not at all her name, not even close; just a public consumption pseudonym based on the fact we keep joking that she's like a little kitty - always aware of what's going on, always needing to be aware and present at whatever's going on and putting her nose into things. :-)

So. This thing I knit for Kitty was intended to be a singlet, to be worn as underwear. But the colour turned out to be such a perfect match for her that it ended up being used as an outerwear vest. And since I still have quite a bit of the yarn left, I think I might go ahead and knit a sweater for a future Kitty...

I intentionally made the whole thing in ribbed patterns, so that it could grow with her a bit. Originally, I thought I had a suitable pattern in one of my 1930s German magazines, but, alas, it turned out to be a pattern for a knitting machine and thus useless for my handknitting purposes. I didn't really see anything else I liked quite as much online, until I found a picture of a little girl in a singlet, and thought, yep, that's roughly the style I'm after. Unfortunately, no pattern, just a photo.

And then I lost the link, and found out I had very unconscionably failed to Pin the image, so, my apologies, I have no idea where it came from! It was a blog post featuring more 1930s knitted styles, if I remember correctly. The file name says "child in a singlet 1936" but, alas, that has also not helped me find it again. Neither trying to replicate my original search terms nor straight up reverse image search has been any help either... So all I know now is that it falls into the latter half of the 1930s where so many of the styles I'm drawn to now come from. :P


As you can see, the original garment actually used some sort of brioche stitch (?) in the body, and had crocheted borders around the armscyes and neckline. I had no idea how to begin with the more complicated stitch, and didn't like the idea of the added bulk crochet would add to the very lightweight single yarn I used in the knitting. So I ditched both. (I still don't fully understand crochet borders on knit using the same thickness of yarn. Must be me.)

The yarn is the same as in the blanket I knit for Kitty previously, just a different colour, and not held triple. (Also I have an update on the blanket that it's now clad in a duvet cover and used for Kitty to sleep under regularly!)

I messed up the armscye / neckline shaping and calculations a bit. Learning by trial and error, here! 

Just the facts, ma'am:

What the item is: A child's singlet

The challenge: 2025 #5 Pink 

How it fits the challenge: It's very pink!

Material: Linsieme Kirman, a cone yarn that's 92% merino 8% cashmere

Pattern: My own.

Year: 1930s (c. 1935-1936, based on my inspirations)

Notions: 2,5 mm knitting needles (circular)

How historically accurate is it? As I already said, it's not based on an actual period pattern. I think the construction and gauge are perfectly plausible; I'm less sure about the material.

Hours to complete: No clue!

First worn: This January.

Total cost: I got the yarn for free as industrial remnants!


Further knitting facts:

Yarn weight: Lace, at Nm 14/2 (700 m / 100 g), but I think it fluffs up into more of a light fingering style yarn.

Gauge: 8 stitches per inch. Forgot the row count.

Amount used: 43 g


And then I whipped up a quick project to be sent with a bunch of fairly random things we put together for Ukraine - I just hadn't managed to finish the blanket by the time my sister went to Prague with the things. So by the time I realised as much, in the two days I had left I made a quick baby hat, following instructions in a 1950s knitting book by Helena Dutkiewicz. I have a Slovak translation, but the original is Polish - it says Dziewiarstwo ręczne, but one copy of that I found being sold online only has children's clothing while mine has all sorts of things, so I'm not entirely sure what's going on there. (Also one of many examples of the ways I can kind of switch between all the Western Slavic languages in passive usage. Well, the three state languages, I have no experience with Lusatian. Polish is the hardest, but I can still glean a lot.)

Anyway, this one was labelled as a hat for a 6-12 months old, though I'm not entirely sure whether the sizing still holds up for today's babies. It tells you to use 3 mm needles and cast on 90 stitches for 30 cm, or whatever works for your gauge. I used 2 mm needles and cast on, IIRC, 80 stitches for 29 cm... Sooo. It's extremely yarn and personal knitting style dependent, and the "patterns" in the book all basically work like that. I actually like that about old Central European vintage knitting, although it also often involves a great deal of wild guesswork.

The yarn I used is a soft acryllic I bought years ago in a church charity sale. So this is a charity project through and through. :D


The construction is extremely simple. It's just, basically, a large Dutch heel in garter stitch. Then you pick up stitches around the face opening, increase in every third stitch, and knit a border / brim / flounce (it's not very flouncy). It's supposed to be a bit bigger, but I ran out of my ball of yarn at that point, and figured that I liked it as it was and that I did not want to attach new yarn at that point where it would inevitably be visible. Then you string a tie through the bottom - mine's just a crochet chain.

The knitting facts:

Yarn: A German acryllic no-name. Seriously, there's no name on the label, it just says "Garn" (yarn)! (Then a bunch of other languages, including Czech without diacritics...) JES Collection by J.E. Schum Würzburg, colour 130 (white). My guess is it's from the 90s or early 00s, but that's just a guess.

Yarn weight: 130 m / 50 g, i.e. 260 m / 100 g, based on a Ravelry entry for a similar-but-not-the-same yarn from the same manufacturer I'm assuming DK. Recommended needle size 3-4 mm, recommended gauge swatch 22 stitches and 28 rows for 10 cm. I didn't follow this.

Gauge: I forgot to actually measure it, I just winged it based on my mitered squares from this self same yarn, but it comes out at 7 stitches per inch in garter stitch.

Amount used:  38 g.

Saturday, 18 November 2023

#HighQualitySockContent

Just. You know. Socks.

Handknit sock yarn socks. They are, as my sister said, addictive. And she's only wearing them!


This is the newest pair, following The Modern Maker's principle of "Italian / antique heel", but not following either of his patterns directly; I did my own thing. The patterns are here, and in the book Knitting with the Modern Maker Vol. 1.


I still need to tweak it a little bit, but I'm satisfied that I've got something very workable. Wearing them right now and they're very nice and fit almost just right; I just feel like I need to change them around the heel a little bit more. Or maybe I made them a tad short. I suppose once I have something I would deem perfect, I might have to write it up, with proper credit of course?

This pair is 68 stitches on 2 mm needles. Yarn is Best Socks by VlnaHep (Czech company), colourway 7118 - no longer available. My gauge with thinner 4-ply sock yarn on 2 mm is about 9 stitches per inch; not sure about row gauge.

There's more nice new socks I never posted about here. I've just realised some of them were HSM entries and deserve their own post, though.


This pair, also featuring Best Socks 7118, plus Drops Fabel 108, went to Ukraine early this year. 72 stitches, again 2 mm needles. The idea was to make them fun and colourful. I don't know where they ended up, the person going there had more destinations, but I hope they did and do help brighten someone's day.


These were my first attempt at a Balbriggan heel, last year. Yarn is Sportivo by Vlnap, but it's from a "mystery packet", not their regular production which is all patterned - there wasn't even a colourway / dyebatch number. 64 stitches and 2,5 mm needles.

I like 2,5 mm for lighterweight but still durable socks, but compared to my previous pairs in different yarns, these exhibited some considerable superwash stretching - ended up at about 7,5 stitches per inch and honestly that's not great in this yarn. Lots of loose fluff quickly accummulating around the heel. Now they have also been accidentally dyed in the wash and have lost their bright blue colour. I don't particularly mind, see about the stretching and stuff. Also I made the pattern up as I went and it's not perfect. Good learning experience, not entirely the best socks. I did like the colour, though, so I am somewhat sad to see that go and I think I need another bright lighterweight pair like that. Not the same yarn, though. (Not that I can get it anyway.)


(Hashtag title courtesy of Matt and Tom.)

Wednesday, 2 March 2016

Deciphering Historical Clothes: Czech wristwarmers from the 1880s

The HSM theme for March is Protection. Looking through my pins of Czech historical garments, I was left uninspired in that regard. (I try to focus on Czech collections in this series now, because it's a good way for me to study and showcase my own country's history!) Until I remembered an item I'd already wracked my head about, an item that protects from cold, so it fits the theme beautifully. Even more so because we've got snow now! Makes my plans of finishing a straw hat or covering an umbrella / parasol kind of less attractive than taking up my needles...

Yep, I'm doing a different thing this time around: I'm looking at a knit garment. Well, an accessory of a super-simple not-shaped kind; but made interesting with lots of colours.

Apologies to my non-knitting readers, and a warm welcome to those who knit. :-) I'm still something of a beginner intermediate in the world of knitting, but things like this inspire me to get better!

There isn't much knitting to be found in Czech online collections so far, sadly; it seems knitting, on the whole, wasn't such a big part of Czech folk culture as it tends to be in colder climates. Or at least not big enough for museum collectors to focus on it. :P But I've still found a few very interesting things (notably, Moravian Wallachian socks!). And one very, very striking thing was this pair of patterned wristwarmers that not only uses seven colours, but one of those colours is even metallic silver!


Not a sort of thing you'd see in Moravian Wallachia, I think. The description on Esbirky unfortunately does not specify where exactly these do come from; but it does give another very helpful detail for deciphering and possible recreating: the dimensions. Cca 20 cm around and 12 cm long. I'd slate them for a woman's wristwarmers based on that, although that's obviously just a guess.

Looking at the opening in the big photo and counting very carefully, I've arrived at the tentative stitch count of 88 stitches: it seems to be somewhere in the area between 80 and 90, and it has to be divisible by four (because of the patterning). It doesn't strike you immediately from looking at the photo, but it also has to be a small gauge (and given the density of the knit, likely a combination of tiny needles and slightly thicker yarn, my favourite way to knit :D): 88 stitches in 20 cm gives me the approximate gauge of 11 stitches per inch. (<= 44 stitches per 10 cm / 4 inches)
The silver threads are somewhat thinner than the wools, and distort the knitting.

It's knitted flat: notice the seaming inside.  UPDATE MANY YEARS LATER: I'm actually not sure what I was looking at - it's just the "step" you get from joining to knit in the round and not bothering to correct for that...


Notice also that the museum photographed one of the wristwarmers upside down. The trick to deciphering a knit garment is first and foremost looking closely and deciding where upside/downside is. Much like the grainlines in woven fabrics. In the above photo, it's the piece on the right that's upside up.

"Fair Isle" knitting is fun and easy to decipher, especially on a "flat" object like this, because you can see the individual stitches clearly and really all you have to do is chart it out... It's the purled beginnings and ends of the knitting that gave me some trouble here, and I had to resort to trying it out.

My first two-coloured attempts weren't very promising:


It actually is super simple - it's just garter stitch - but I still struggle with visualising how multi-coloured purls work... When I switched to my final mock-up in the actual colours, I still had to unravel it a few times, and as you can see, I still made a mistake in the upper section of it (it should end up looking like orange-yellow, not yellow-orange). But it's a mistake small and obvious enough for me to know how it should really go.
(My yellow is much thinner than my green and therefore distorted in that section, but it's correct.)
 

I knitted this test piece with 12 stitches, in yarns calling for cca 3 mm needles according to the maker (most of them are remnants of unknown description, though), on 2,5 mm needles, and it came out 5 cm wide, so for the original size, you'll want to go about half that...

* * *

So, here goes the pattern as deciphered. If there are any experienced knitters among you, used to English charting conventions etc., I would appreciate knowing if this makes sense to you or if you'd write/do some things differently.

If you want to knit this in the round, just knit every "wrong side" row of the garter stitch sections instead of purling them. In my experience, stranded colourwork is easier in the round; but to be historically accurate to the original, flat knitting it is. (AHEM)

Beginning in garter stitch
cast a number of stitches divisible by 4, in red (88 with a gauge of 11 st / inch for the original size)
1. (right side) purl red
2. (wrong side) purl orange
3. (r) purl orange
4. (w) purl 2 stitches in yellow, purl 2 in green, repeat
5. (r) purl 2 stitches in green, purl 2 in yellow, repeat
6. (w) purl red
7. (r) purl red
---------------------------

Stranded colourwork in stockinette
66 rows, starting on the wrong side
(The museum description says the rows of motifs repeat thrice, but they don't really, which was the original reason I tried to decipher it. :D)
Chart starts at the bottom. Grey stands for silver, obviously. The blue dots at the side indicate fifth rows, red dots indicate tenth rows, for greater ease of keeping track and count.


---------------------------

End in garter stitch
1. (w) purl red
2. (r) purl red
3. (w) purl yellow
4. (r) purl orange
5. (w) purl red
6. (r) purl bind off in red

* * *

In case you are wondering, I made the chart in MS Paint by magnifying, utilising the grid and the pencil tool to colour individual pixels in the magnified grid, and then hitting PrintScreen and working with that as my picture afterwards. It's a quick and "cheap" method, and it made charting very easy with opening the MS Paint window on top of the photo of the original. If I do this more often, though, I'd probably prepare myself a grid to colorise (using the Can of Paint tool in that case), skipping the magnifying and PrintScreening, because it comes out a bit small this way (so I can't insert any notes and stuff into the chart itself if they are necessary).


One day, I'll make these wristwarmers and post this pattern to Ravelry so that there will be a traditional Czech pattern out there. *rubs her hands with a supervillain snigger*

Wednesday, 1 July 2015

HSM #7: Accessorise - A fichu en marmotte

Once upon a time, The Dreamstress posted a terminology post that postulated the existence and reasons behind a simple style of headscarf called fichu en marmotte in French.
Now, I was obviously thrilled by that. Not only does it relate to my nickname, it's even a style of headscarf I'd already adopted before that post.

Once upon a time, a little later, I found this fashion plate, and that solidified my love for fichus en marmotte, and also supplied me with a slightly different style of tying one (a bigger one). Which I've defaulted to so often, I became painfully aware of how one-note I was becoming.

So it's been in the plans for a while, making new fichu-en-marmotte-able scarves, and the first scarf itself had been in the works for quite a while, too, but I only finally managed to finish it now. Just in time for the Accessorise challenge!
(It was originally meant to go into the Terminology challenge last year. Well, as long as it got finished!)


What the item is: A fichu en marmotte
The Challenge: #7 Accessorise
Fabric: white & green printed cotton - originally a thrifted pillowcase
Pattern: none - it's a cca 80 x 80 cm almost-square
Year: 1790s, inspired by a 1797 fashion plate
Notions: white cotton thread, ooooollld "wine red" & "light brown" dyes (turns out in the parlance of the day, "light brown" was more like something I would call simply "brown", so it turned out browner than I planned - that's what the picture with the Latvian flag is there to demonstrate)
How historically accurate is it? I don't know, maybe 75%? It's just a hand-hemmed piece of fabric. The original green of the print was way too saturated, which is why I overdyed it. The dye itself is definitely not accurate, but overdyeing something would be, and the colour could be achieved with period dyes. :-)
Hours to complete: I worked on it on and off for months between other projects, but the hemming could not have really taken more than cca 4 hours altogether. The dyeing was cca 2 hours, plus about 9 hours in a vinegar solution to set the dye better.
First worn: Today
Total cost: I forgot - it's been a while since I bought that pillowcase. Thread was vintage and a gift. Dye was almost vintage, too. Refer to fabric size and local dye prices for an approximate idea...


In case you were wondering why I overdyed it - here's what the original pillowcase looked like:


Kind of; I've only got this high-contrast photo that may distort the colour. It's not a bad colour, but next to my face, it was too harsh.

* * *

Oh, and in case you were wondering who it is I'm holding? One of our cats has kittens. Three. All black.

Saturday, 24 January 2015

HSF #23: Modern History & HSF #24: All That Glitters - Jewellery bits and pieces

I'm putting this up in the wrong order, but that's because some of it is waiting to be re-made, so...

For the last challenges of last year, I decided to add to my historically-usable jewellery collection. One of the things I really wanted was the key brooch from this plate.

So that's exactly what I made. It was as simple as buying the requisite components and gluing them together. (Well, and then changing the colour, but more on that later.) So I put that under "Modern History", because it didn't involve much changing of the modern components, so it's obviously something you could do just by walking into the shop and picking what you'd like, without the historical inspiration.


Now, about the colour... The components available in that shop are mostly silver, with only some brass and gold. I suppose gold isn't fashionable right now or something. It's a bit of a problem for me, because most Regency-ish jewellery involves gold rather than silver. I resigned myself to a silver key, but then Leimomi mentioned her experience with colouring metal buttons on my Facebook post. I looked up the marker she had used, saw it was "acrylic" and realised I had golden acrylic paint. So I went ahead and tried it and the results were quite good. Except that it rubs off with force (like when it fell into the radiator, eek) and washes off. So now I have a half-gold brooch and have to decide if I'll resign myself to a silver one again, or try and figure out some other way to colour it gold...


What the item is: A key brooch
The Challenge: # 23 Modern History
Fabric: none
Pattern: none, but the idea came from the aforementioned fashion plate
Year: 1797
Notions: key-shaped jewellery component, jewellery pin, super glue, golden acrylic paint (or maybe not)
How historically accurate is it? The key-shaped brooch is documented, but this one is probably some non-historic kind of metal and got painted with acrylic paint. Plus superglue.
Hours to complete: Minutes till the glue dried... plus much longer with the paint - quick to paint, long to dry.
First worn: In the silver stage, sometime in later December, modernly into a restaurant, holding together a low neckline slit on a blouse, exactly as it's done historically on that plate.
Total cost: If I remember correctly, 25 CZK for the key and 5 CZK for the pin = 30 CZK = cca 1,35 USD. Plus superglue and acrylic paint, but either amount used is just a fraction of the whole package.

* * *

For the following challenge, All That Glitters, I followed in the jewellery components vein and made two hat pins / something that could be used to hold Regency headpieces in place, etc.

The first is another very simple superglued piece. Remember how I've found some "beads" without holes when I went through my bead stash? I've found the perfect use for them.


It's as simple as can be, but I'm sure I could make it more fun and add those decorative metal bead "caps" in further iterations of the theme.
(Because the bead is round and the base is flat, and the superglue still takes some time to dry - at least the one I have -, I had to try gluing it twice. Just a word of warning.)

The other pin is more elaborate, and I plan to write a tutorial of sorts on it in a following post, because it's a fairly simple technique that could be applied to other kinds of decorations (I have a feather piece in mind.)

 
The golden-ish sheer ribbon was a small piece I found once in the remnants bin and bought just because I liked it. The button was an orphan in the stash. This is the best kind of project, using something like that in a lovely and meaningful way!


What the item is: Two hatpins
The Challenge: All That Glitters
Fabric: none
Pattern: none, but I took inspiration from American Duchess' cockade tutorial for the second one
Year: 1800s-ish, but it could be used for a range of eras
Notions: two kinds of hairpin components, small glass ball, superglue, two kinds of polyester ribbon, thread, metal shank button, and felt for the base
How historically accurate is it? Superglue. Polyester. Modern jewellery components. But it's simple and small, so not so jarring; and the second one is handsewn. Using The Dreamstress' criterium of "would a historical person recognise it for what it is?", I think it passes.
Hours to complete: Minutes till the glue dried for the first one, maybe an hour or so for the second one (I made it in two sittings, so I don't remember anymore).
First worn: not yet
Total cost: I forgot. And I bought the components together with others and the bill never tells which price was for what, so I can't look it up. But it can't have been much, all in all. The ribbons, button and felt were from stash; otherwise, they would probably be the pricier part of it.

Wednesday, 7 January 2015

HSM '15 #1: Foundations - Teeny bumpad + a glimpse of something else

Happy new year, everyone!


For 2015, the Historical Sew Fortnightly has transformed into the Historical Sew Monthly, which was meant as a relief to the Dreamstress, but I think it's really a relief to practically everyone. It's definitely a relief to me - I will have a busy year ahead and I never managed much for the Fortnightly... whereas a month is a longer time to squeeze some little making in here and there, hopefully even when you're busy.

January, at the beginning, is a bit easier on me still, so I'm actually managing to do more. Maybe it's a buffer against future lapsed challenges (I'm especially not sure about April and May, also because I'm not quite sure what I want to make for those challenges).

So the first thing I made was a teeny bumpad. It's something I may need for my beloved 1790s-Regency era, and it's something I may need when I finally get around to making the 1848 costume (I do have ideas for making most of it usable in a modern context, for the record).


(That's our Christmas tablecloth there, before it was thrown into the laundry.)

It's a stashbusting project. The fabric used to be a child's duvet cover that was passed to my family years ago with the idea we may use it for sewing. The colours are so garish that I've only used it for muslining so far. They're so garish that I decided to use the wrong side at the last moment, which is why there are pencil lines on the bumpad...

It's filled with tiny scraps I've been hoarding for stuffing things with. I have a big bag filled with them and this used up only a tiny portion of that, but it's a start. :D
They're cut into thin strips, about 1 cm wide - that way, they stuff in more easily and evenly, without so many bumps. I stuffed it not too tightly, just tightly enough to give it a firm shape, but with some give for it to bend a bit - because I want to use it both at the waist and at the underbust.


I made the pattern using an aluminum foil contraption (really, just tightly rolled up layers of it) that was meant to approximate a flexible ruler for taking curves off the body. (I don't remember anymore where I learned this trick, but it's not my own idea.) It's not as stiff as a flexible ruler probably would be, at least with the amount of layers I've used, so there's still some guesswork involved; but it's quite a bit of help.


Shiny!

And that's your glimpse of something else underneath.

One of the most annoying things about sewing is when you find out the trim you wanted use just so isn't enough.


So I'll have to dig up something else or resign myself to plain hem. But that's all a matter for another post. Back to topic.

Just the facts, ma'am:

The Challenge: HSM #1 Foundations
Fabric: striped printed cotton
Pattern: drafted by me
Year: cca late 18th century to mid-19th century
Notions: white cotton thread, scraps for filling (I'm probably still going to attach a tape to it, too)
How historically accurate is it? Plausible, I suppose, but the materials are dubious and it's partly machine-sewn.
Hours to complete: 1-1,5? Plus making the pattern. The stuffing takes probably the longest.
First worn: not yet
Total cost: Minimal. All stash; the fabric used is just a cca 50 x 20 cm strip. Cost of filling depends on what you decide to use...

Friday, 1 August 2014

HSF #13: Under $10 - 1930s-40s-style trousers

Remember my almost favourite trousers?
I've wanted a new pair of wide-legged white summer trousers for quite a while now. Over time, it evolved into a pair of 1930s-40s-style wide-legged trousers. I looked at pictures, I looked at vintage patterns online, I compiled a Pinterest board for active wear / outdoors wear / hiking wear / whatever of the era, inspired by Swallows and Amazons (I love Arthur Ransome's books, as my Literary Heroine Party questionnaires attest to). After all that, I was on the lookout for white cotton twill to make my trousers. Sounds like a basic enough fabric, right?

A basic, classic look, right?

Well, that was probably the problem: the shops I visited were full of colourful prints and low on very basic fabric. And I didn't always have the money to spend on fabric, so I could not be on the lookout all the time. In the end, I found exactly the fabric I wanted this January, with my Christmas money. And it was in the remnant bin, so it was marked down. All great, and I bought it; the problem was, there was only about 1,2 m of it, so I wasn't at all sure it would be enough for my wide-legged trousers.


At the beginning of July, I finally mentally crossed my fingers and cut into it. I just so-so squeezed the trousers out of it, with the help of
a) the fact that I have short legs, so 1,2 m was long enough for both legs and waistband,
b) inside waistband of a different material,
and c) some creative seam allowances (and this is one of the two huge reasons why I love the continental Europe practice of patterns with no seam allowances and going by the sewing stitching line, thank you very much).

 See? Some very creative seam allowances there.

Oh, and d) forget about those folded-up cutting diagrams. Such a waste of fabric. I never use that sort of layout, I just make sure I have the grain right and cut wherever I can squeeze it.
It did help that I was going for the vintage style with a lapped zipper on the side: a fly would take more fabric. Somehow, I even managed to squeeze the visible part of the slant pockets and the belt loops out of it. And I still have some small scraps... well, more like tiny. (Probably not even enough for doll trousers. I'll probably still try. :D)

The pattern is based on the one taken from those trousers I found at home. I made the back darts a bit bigger in the process. I also altered the front crotch a tiny bit (the original is very L-shaped, I made the curve more gradual because it always felt a bit off). Made a waistband, of course. And following the example of the vintage patterns I've looked at, the legs are not tapered at all, just cut straight down from the crotch/hips.


It results in a bit of a baggy look, but that, I believe, is quite correct for the era.
As you can see on this photo, though, I may still have to line the top part - the navy stripes of my T-shirt and my pantyline (ugh!) are showing through.

The fabric got a bit off-grain in the wash, so the trousers are cut a bit off-grain, too. Here's hoping it won't play havoc on them over time.

As mentioned previously, there's a lapped zipper on the side - handpicked. Then there's hooks and thread bars in the waistband. The hem allowance is handstitched, too. Otherwise, it's straight stitch (+ flat-felled inseam), zig-zag and some pinked seam allowances (at the pockets and in the waistband).


I also made use of the selvedges wherever I could.

The most important thing, of course, is the fact that I finally have nice casual trousers I can squat in and do stuff in without exposing my back.


Okay, they're white, so it's probably not a good idea to do all kinds of stuff in them. But the point is, I have a pattern that works.

In the end, styled with a striped T-shirt and the matching Miss Barbora hat, in emulation of the beachwear of the time, it's definitely more Miss Barbora than Swallows and Amazons. I plan on using the same pattern to make shorts for the Outdoors challenge, though, and that will fill that Ransome doing-all-kinds-of-stuff slot. :-)
Thus the "Pattern - Nancy" tag.


Just the facts, ma'am:

The Challenge: #13 Under $10
Fabric: cca 1,20 m of a white cotton twill remnant + a piece of an old tan cotton twill pinafore for the inside waistband. Oh, and I forgot about the old bedsheet for the pockets...
Pattern: my own, adapted from a pair I own
Year: cca 1930s-1940s
Notions: white cotton thread, metal zipper, hooks (+ thread bars, because I did not have enough overlap in the waistband for an eye)
How historically accurate is it? I think about 80-90%? I based the style on vintage pattern pictures, tried to only use techniques that would have been used then (straight stitch, zig-zag, some pinked seam allowances, some handsewing). But the slant pockets, placement/number of darts and details like that may not be quite accurate.
Hours to complete: I lost count; like usual, it took longer than I had expected, there was quite a lot of handsewing... maybe 10?
First worn: So far, just for some quick pictures (it was either too hot or too rainy for actual wearing). They’ll definitely get a lot of wear, though.
Total cost:
Cca 160-170 CZK for the fabric (I've lost the receipt), 15 CZK for the zipper + the other odds and ends take it to about 200 CZK = Just about those 10 USD (yay for remnant bin!).


Also wearing:
the Miss Barbora hat - C&A, a gift 
striped T-shirt - Ellen Amber, thrifted
necklace - made by me
belt - unknown origins, found at home
shoes - Clarks, second-hand

And a tomcat who wasn't happy about becoming a fashion accessory at all. 

Oh, right, outside of being a Historical Sew Fortnightly item, it's also an #Oonapalooza item for the Sewcialists group. So I wanted to be a bit more creative with my photos, Oona-style, but no. My poses, it turns out, are limited to: front; back; maybe side; okay, squatting down not very creatively; looking off into a distance in a manner that makes me unwilling to share those photos; grabbing a cat and hoping for the best.

Sunday, 13 July 2014

Cleaning up my space + HSF #13: Under $10 - The light entry (and a half)

I am slowly but surely cleaning and organising my room. (I've cleaned out a table for my sewing machine, and now it no longer has to sit on the dining table, yay! More room to cut fabric. :D) There were all these beads and components that I've been holding onto for years, with vague ideas of what I wanted to make, but it was all just catching dust. Pah.

So I went ahead and started making things instead. The idea here is, when the beads are unused, they sit in boxes and jars, using up flat horizontal space, while when they are made up into necklaces, they use up only vertical space on the outer side of the bunk bed (where nobody sleeps anymore):


It's a storage solution that I'm very proud of. :-) A combination of something I saw in an Ikea catalogue (with the hanger and sunglasses) and what I saw on Pinterest - it's here. The original poster used purchased hooks and towel rod, I settled for what I already had and am making my hooks from a (probably aluminum) wire I've found in my father's storage. He said he did not need it. I did. Perfect.

Now only if that stupid old sticker could be scraped off so easily.

* * *

My entry for the challenge was actually made from new beads, which, in their similarity to beads I already had, inspired me to do something about it. One of them - you can sort of see one at the closure that's a slightly different colour - I already had, the memory of which was what prompted me to buy the others. It's a somewhat skewed idea of using what you already have, but it did also prompt me to start using the other colours. ;-)

This is my light entry for the challenge. One that's not strictly historical, but it will serve me well with my historical things. (I have another entry, but it needs to be washed first, because I already managed to squirt cherry juice on it. Just by eating the cherries.)


The Challenge: #13 Under $10
Fabric: none
Pattern: none
Year: non-specific and variable; the idea was something to wear with my Regency clothes, though

Notions: glass beads, spring closure + ring, thin plastic-encased jewellery wire
How historically accurate is it? About 30%, I suppose. The "wire" is very much not and the closure is probably not accurate for Regency. I was using what I had on hand. Simple glass beads, on the other hand, are very historical and will cover me for many decades!
Hours to complete: under an hour
First worn: yesterday
Total cost: The packet of beads was 20 CZK, the wire (of which I used only a part) was 5 CZK. The closure was bought in a packet and I don't remember the cost, but since I only used part of the wire, I think 25 CZK is just about right.

The light blue / aqua of the beads is such a lovely, striking colour that the simplicity of it only enhances it. It's quite short, sitting close to the neck, which is a style you often see with pearls and beads (of whatever material) in the portraits of the era. While the colour may not be what you see often, you also don't often see portraits of more "ordinary" people, so who's to say a girl from a small Bohemian town would not have chosen them?
I'm still hoping for the pearl variety one day, but for the time being, my beloved shade of light blue is more than enough. :-)

* * *

The half:


One of those aforementioned colours of glass beads I already had was this very, very red. I had, years ago, got the idea that they looked like rowanberries, and purchased some components to make them into a rowanberry-inspired tiara or earings or something, when I figure out how.

Since then, I've figured out that with my limited jewellery making skills and the limitations of components you can find in shops, it's not likely to happen. Instead, I've turned to a style that I still don't quite know how to make either, but have some less vague ideas for:

Portrait of a Woman by Henri Francois Mulard, c. 1810, detail

Coral tiaras seem to have been very, very popular - you run across extant pieces often (just google "coral tiara" and see what happens...). They tend to be this exact shade of red, too. Gold components to thread something through are much more common than rowan-shaped ones, so I think sooner or later, I'll chance upon something that I can stick those pre-made parts into. The tiara part is still a little bit unclear, but you do find headbands as well, so I think it's that and glue / wire to the rescue. And I can still pretend they're rowanberries if I want to.

There are also some loose "beads" in the same colour; some larger and some smaller than these. I wrote "beads" in quotation marks, because they have no threading holes. They're just little glass balls.


I've found these for basically all of the colours in the original mix. I guess they're some faulty specimens; but their different sizes could come in useful in a design and I really want to figure out a way to incorporate them...

Saturday, 19 April 2014

A new cover for my mobile phone (and a partial tutorial)

I sorely needed a new cover for my mobile phone. I made one about four years ago and it was no longer fit for polite company.

So, that's what I've just done. Made a new cover for my mobile phone. With felt inside to protect the phone.


It's not perfect - it's only the second one I've ever made, and the first I've done with felt and on machine, and there's some fiddly stitching around corners in very limited space that I really could have done better... among other things. But the first one lasted me for four years, so hey, not bad.

Although towards the end, the first one looked like this:


So yes, I definitely needed a new one.

I got very lucky with the fabric. Some time ago, Spoonflower did a promotion on a new fabric - it's called Silky Faille, which of course means there's no silk in it at all and it's all polyester. Anyway, you could get a free swatch of it, so I used that opportunity to finally get myself some of my favourite design.

I mean, my favourite design of mine. I have several up on Spoonflower, but never got around to ordering any, because money and international shipping and who knows what else. Which, of course, in Spoonflower's policy meant that no one else could order them either, so it was all just a mental excercise.

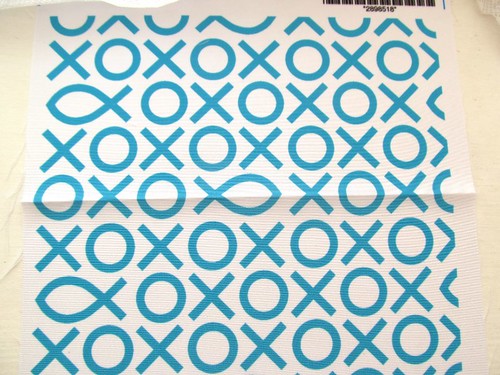
But thanks to this, there's now one up that you can order yourself! And now they offer the prints in wallpapers and gift wraps and decals as well, so if you're not into sewing, you can still get yourself, for example, a gift wrap with tic-tac-toe and some fish pictograms. I'm quite proud of this idea, and it turned out very well.

Tic-tac-toe fish 1 

End of shameless self promotion.

That photo above is the swatch I received. The blue is a very nice deep, rich turquoise blue (almost teal), so I was very satisfied - I was afraid the colour of the printed fabric would be blander than on screen (as it apparently happens with some colours), but no, it's actually a bit more saturated than on my screen, so it should last well.
And as I looked at the swatch, I thought it was perfect size for the new mobile phone cover that I so desperately needed.

As it turned out, it was not only perfect size, the spacing of the pattern was more or less perfect, too!


This here is my very simple pattern. You need the width of your phone (in my case, I went with 4,5 cm), the height of it (I went with 10 cm, which was slightly more than the actual height), and the thickness (2,5 cm - I also store an additional Mini SD in its case in my cover, so the thickness is more than the actual thickness of the phone).

Cut the same from felt. You can leave very narrow seam allowances with felt if you're confident you'll manage them under your sewing machine foot. I did. I'm one for minimum seam allowances and minimum fabric waste.


Sew the bottom corners first.


Then the bottom seam.


And then the side seam.


And make it nice and smooth.

Very quick, very simple. Do the same with your outer fabric. The faille frayed a lot, so I stitched it with a zig-zag stitch to prevent the fraying.

What follows is the part that I think I could have done better. There must be a better way to do it. Anyway, what I did was put the felt into the outer shell, stretch it all to fit together - I put in the mobile phone and the SD case to make it fit together the way it should. And fold down and pin the seam allowances of the shell to the felt.


This was where it got very unscientific and messy. I could not figure out which side to pin from, and which side to sew from, and so on. And at the bottom corners of the flap, I had to clip the fabric so I could fold it, and now I have exposed clipped bits there.

Anyway, I took the phone out again and topstitched it together (from the inside). And that's how I made my felt-lined mobile phone cover. Feel free to steal the idea, and feel free to order the fabric and use it for yours. :-)

Oops. I slipped into shameless self-promotion again.

Tuesday, 1 April 2014

I'm looking at you, Oona


I've suddenly realised that I'm somewhat bolder - or perhaps more "so what?" - about pattern combinations than I used to be. It's subtle, subtler than Oona's technicolour, but it's there. I would not have put this simple everyday outfit together like this - maybe not even a year ago. Or if I would have, I would have felt self-conscious walking the street like that, wondering if it looks weird. I only started feeling self-conscious today upon realising that I wasn't, that I liked what I was wearing.

I suppose this is how personal style happens. When you stop putting your clothes on just like that. And then you stop worrying if your clothes match and if the skirt hits a good spot on your legs and if the sweater does not make you look fat (actually, I don't think I've personally ever worried about that last item, but you get the picture). And you put your clothes on just like that.

I don't wear this every day - I still have trousers that don't fit me very well, and things. But this is what I can throw together when I feel like it and none of it is in the wash etc. etc. And looking at that photo - a quick snap with the camera sitting wobblingly on a chair, because the tripod is at home, and still the photo looks good - I think here I've managed the art of harmonising with my environment, too. :D

I wear that Felicitas Queisser scarf All. The. Time. I like having this as my signature style, for obvious reasons. I really need more fichu-en-marmote-able scarves. Ones I could wear with my bolder colours, too.

 * * *

I'm actually not looking at Oona. I'm looking into the garden. Some spring colours are very bold.


Thursday, 2 January 2014

2013 in review: Part 1

There was a decided lack of posts in 2013. So I'm borrowing something from Natasha Marie (who borrowed it from someone else) and posting a wrap-up.
Seeing as this also happens to be my 200th published post on this blog, I think a wrap-up is very fitting.
Warning: it's long. I'm making up for a year of little posts. So it actually comes in more parts.


What did you do in 2013 that you’d never done before?
Saw an opera. My sister and her husband’s birthday gift for me was a visit to an opera they’d been to several times before already. Now we all want to see it once again, and more. It’s a modern recreation of the earliest at least partially preserved opera, and the music has only the best features of both.

(There's Czech monologue/dialogue until about 1:55.)


(Awwwww, everyone, and I mean everyone, needs to hear that thing! In person! One of the saddest realisations of 2013 is the realisation that that’s not humanly possible.)
I picked one of the artificial laurel leaves they pour out during the performance and keep it as a memento. I do not think I was the only one.
After that, we met with some of their friends from church and made pretzels, which was a first for me, too.
Had port. (Nom!)
Made plum cakes. Cuts. Whatever. (Yummy.)
Made handkerchiefs. :-)
Read medieval English literature in actual medieval English. (With lots of footnotes.) 
Visited Karlštejn. Tourist trap level as expected. The guide's level of knowledge was a less expected letdown. While the castle itself is certainly interesting, you might want to save your money and go visit somewhere else, maybe Ploskovice. I'll post about it this year, promise.


Spent a whole weekend with the people from our youth magazine editorial board (we're mostly volunteers), learning about media and having lots of fun.
Spoke to a Touareg. (Something along the lines of “Could you please sign this for me. – Thanks. – It was wonderful.” See below.)


Did you keep your New Years’ resolutions, and will you make one this year?
I don’t do New Year’s resolutions as such, so there. I do make occasional resolutions (occasional as in for / at an occasion), and right now it’s to finish more of my sewing.

Did anyone close to you give birth?
Not anyone very close to me.

Did anyone close to you die?
Sadly, two of our cats, Yksi and Kuusi (so yes, that Kuusi lesson is a retrospect...).

What countries/states did you visit?
I visited many new places around my own, and loved it!


(The year before, it was Finland, which I still have not gotten around to telling you about. Ahem.)


(This was already in 2012, but whatever.)

What would you like to have in 2014 that you lacked in 2013?
I cannot think of anything in particular. Except maybe attending the interpreting course.

What date from 2013 will remain etched upon your memory?
I don’t remember any particular dates for things that happened to me. So I’ll go with November 8th when my friend did not take an important exam in the end. :D It’s because it’s an important date from my country’s history (the battle of White Mountain) that I could never remember, and now I do!

Did you move anywhere?
No.

What was your biggest achievement of the year?
Probably translating quite a lot into English, in an official capacity. It's not something that you should be doing, mind you, translating into a second language and not your own; we'll have an English editor go over it.

What was your biggest failure?
Probably still failing to finish my sister’s kathak skirt. My sewing failures stand out the most to me, because they’re still lying around the house to remind me.

Did you suffer illness or injury?
Thankfully, nothing serious, just the usual seasonal colds.

What was the best thing you bought?
One thing? Phew. That would be very hard to decide; I don't buy big things.
A beige felt cloche and bamboo scent in January with my Christmas money – the hat is pretty and practical and very much me, and that is actually my first scent, one that’s very much me, too (before that, everything had always smelled just perfume-y to me).
A pair of lace-up boots. 


The Felicitas Queisser scarf - I wear it all the time now, 1797 fichu en marmotte style.


Those 15 meters of lining fabric - that was definitely the haul of the year, maybe even of the decade, but only fabric-wise.
And I finally got myself a purse/shoulderbag that's almost perfect. It might even be leather and it was dirt cheap in a thrift shop. My only complaint is that I would prefer a wider shoulderstrap.
Two Cadfael books, the last in the shop, hidden away in a "last copies" shelf: one for me, one for my sister for Christmas.

Whose behaviour merited celebration?
I think the biggest thumbs up go to my sister for inviting her Latvian colleague and friend who had to stay here over Christmas to celebrate with us, and the rest of the family including grandma for going along with it - even though in the end it did not go quite as planned because of my sister's illness.

On the internet, it's without a doubt Leimomi, for running the Historical Sew Fortnightly which turned out to be hugely popular and way more time-consuming than she had expected; and doing it again this year!

Whose behaviour made you appalled and depressed?
I can’t think of anything. It was a fairly happy year, all in all.

Where did most of your money go?
In general, school.

What did you get really, really, really excited about?
As evidenced by this post, Peter Capaldi as the Doctor.

What was the best concert you’ve been to this year?
It’s a tie between Mark Knopfler & Co.’s concert in May (an online newspaper review gave it 90%, which caused an outrage from commentators who demanded to know what was their excuse for the lack of the remaining 10% :D) and La Dafné in December (an online review gave it 100%). And how could I forget Bombino?! 2013 was very good, concert-wise.

What song/album will always remind you of 2013?
Privateering! The album. I still love it more and more and more. Song is probably Yon Two Crows from it.

Or maybe Her Tenere by Bombino. Yes, that will be the song, because friends and concert and awesome discoveries about the world thanks to the internet.